Shopware 6
Use Paymentwall as a convenient method of payment for your Shopware 6 account. There are many great functions Paymentwall can offer to big or small merchants. Our payments system is logical, simple, and protected. It’s made for do-ers by thinkers.
Prerequisites
- Sign up for a Paymentwall merchant account using this link: Sign up with Shopware
Step 1: Set up your shop
You can start setting up your shop using the instructions from Shopware’s getting started tutorial.
Step 2: Download and install Paymentwall plugin
- Download Paymentwall plugin using on of the following options:
- Download the plugin from Shopware App store
For German language version of the page please use this link
- Download the latest version of ZIP archive from GitHub repository.
Please choose ZIP file named Paym1PaymentwallPayment6-x.x.x.zip with the highest x.x.x numbers
- Download the plugin from Shopware App store
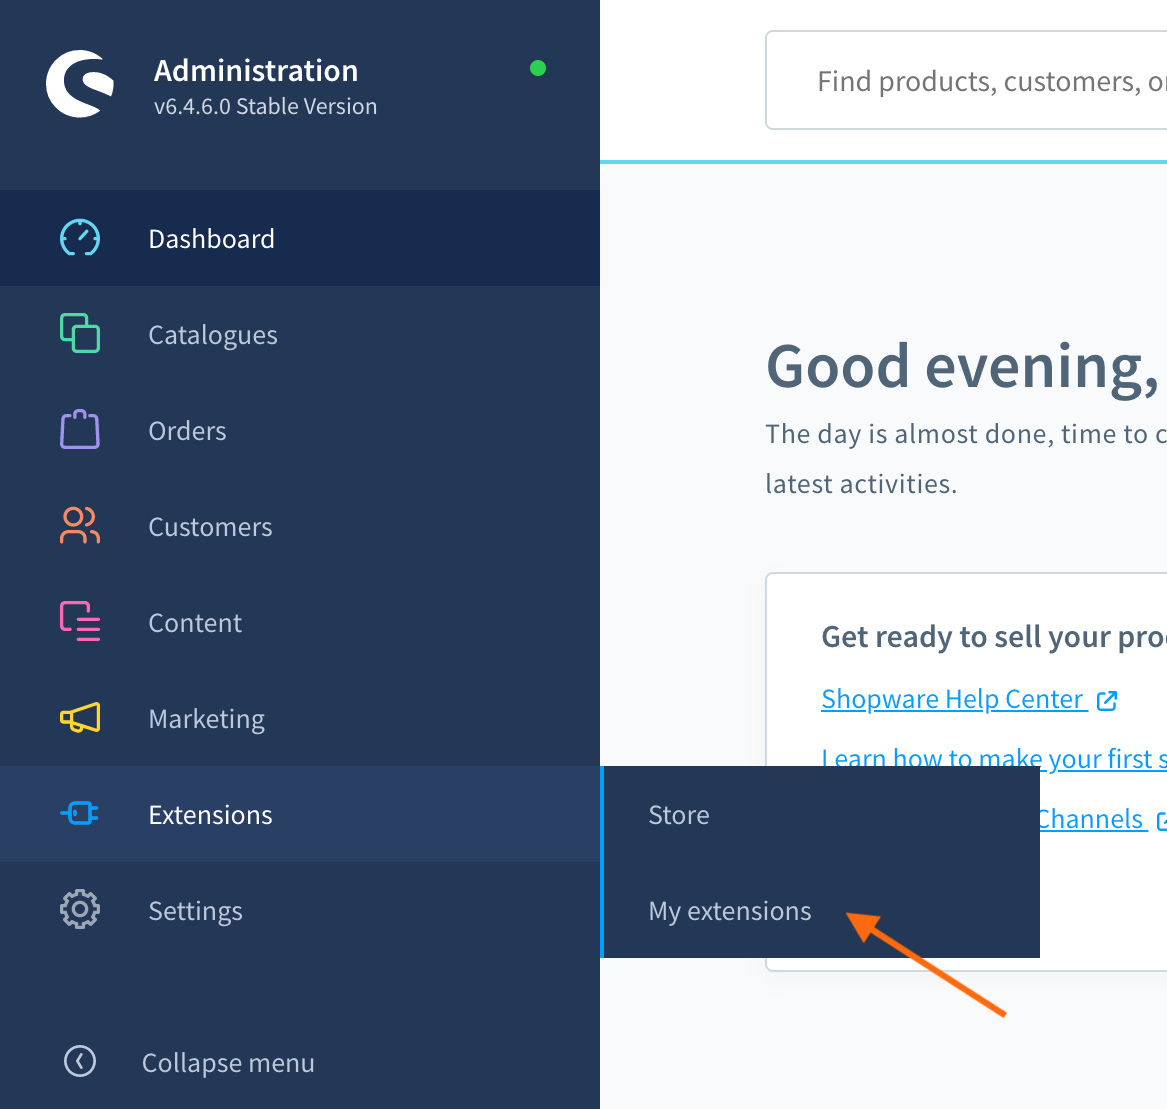
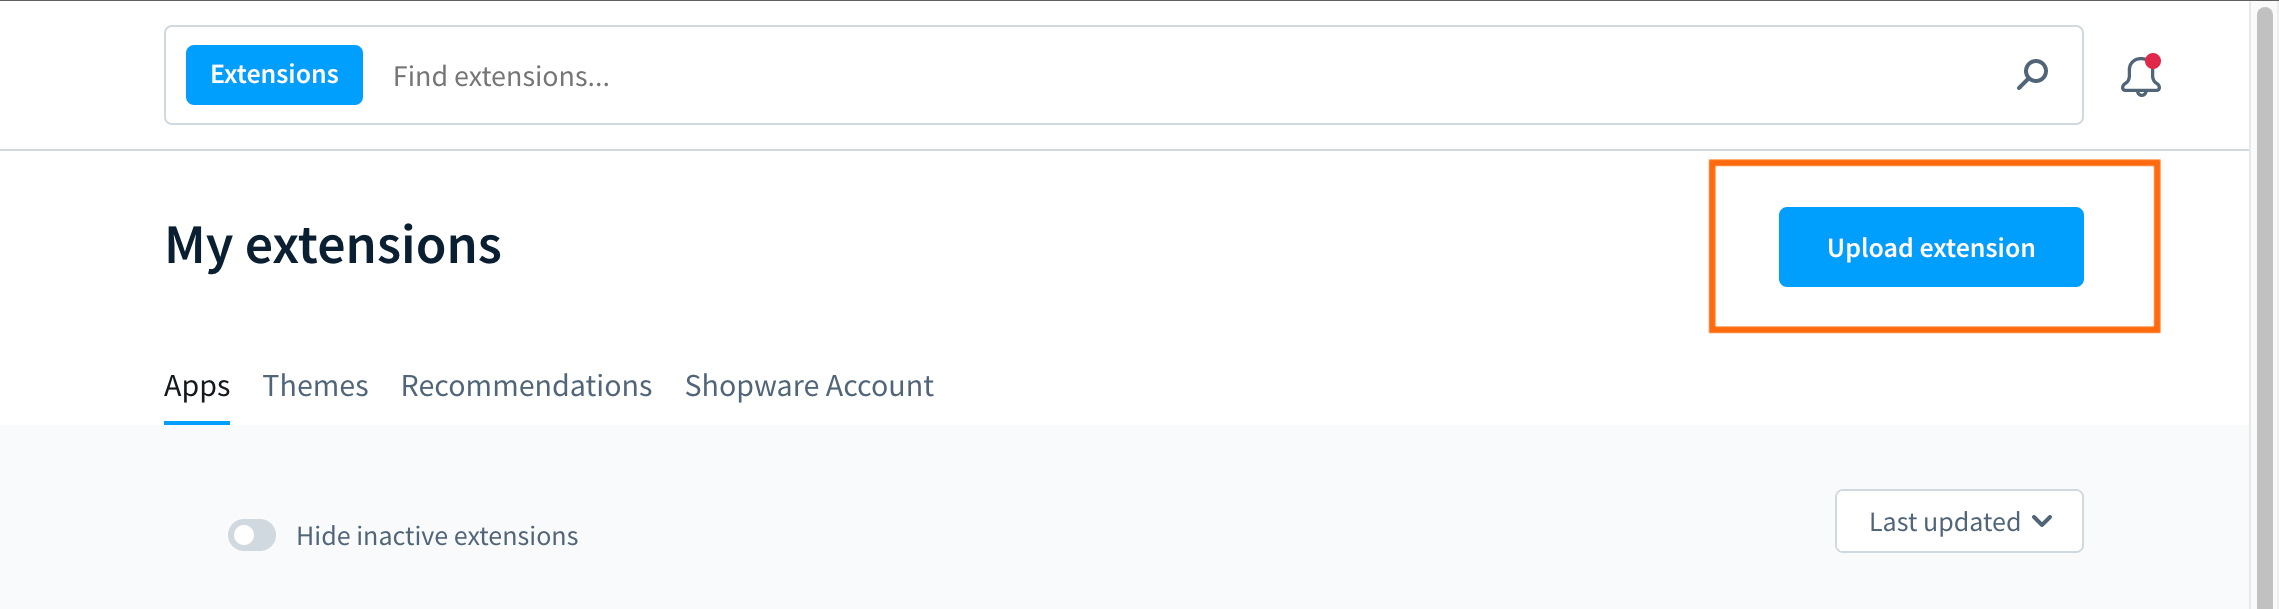
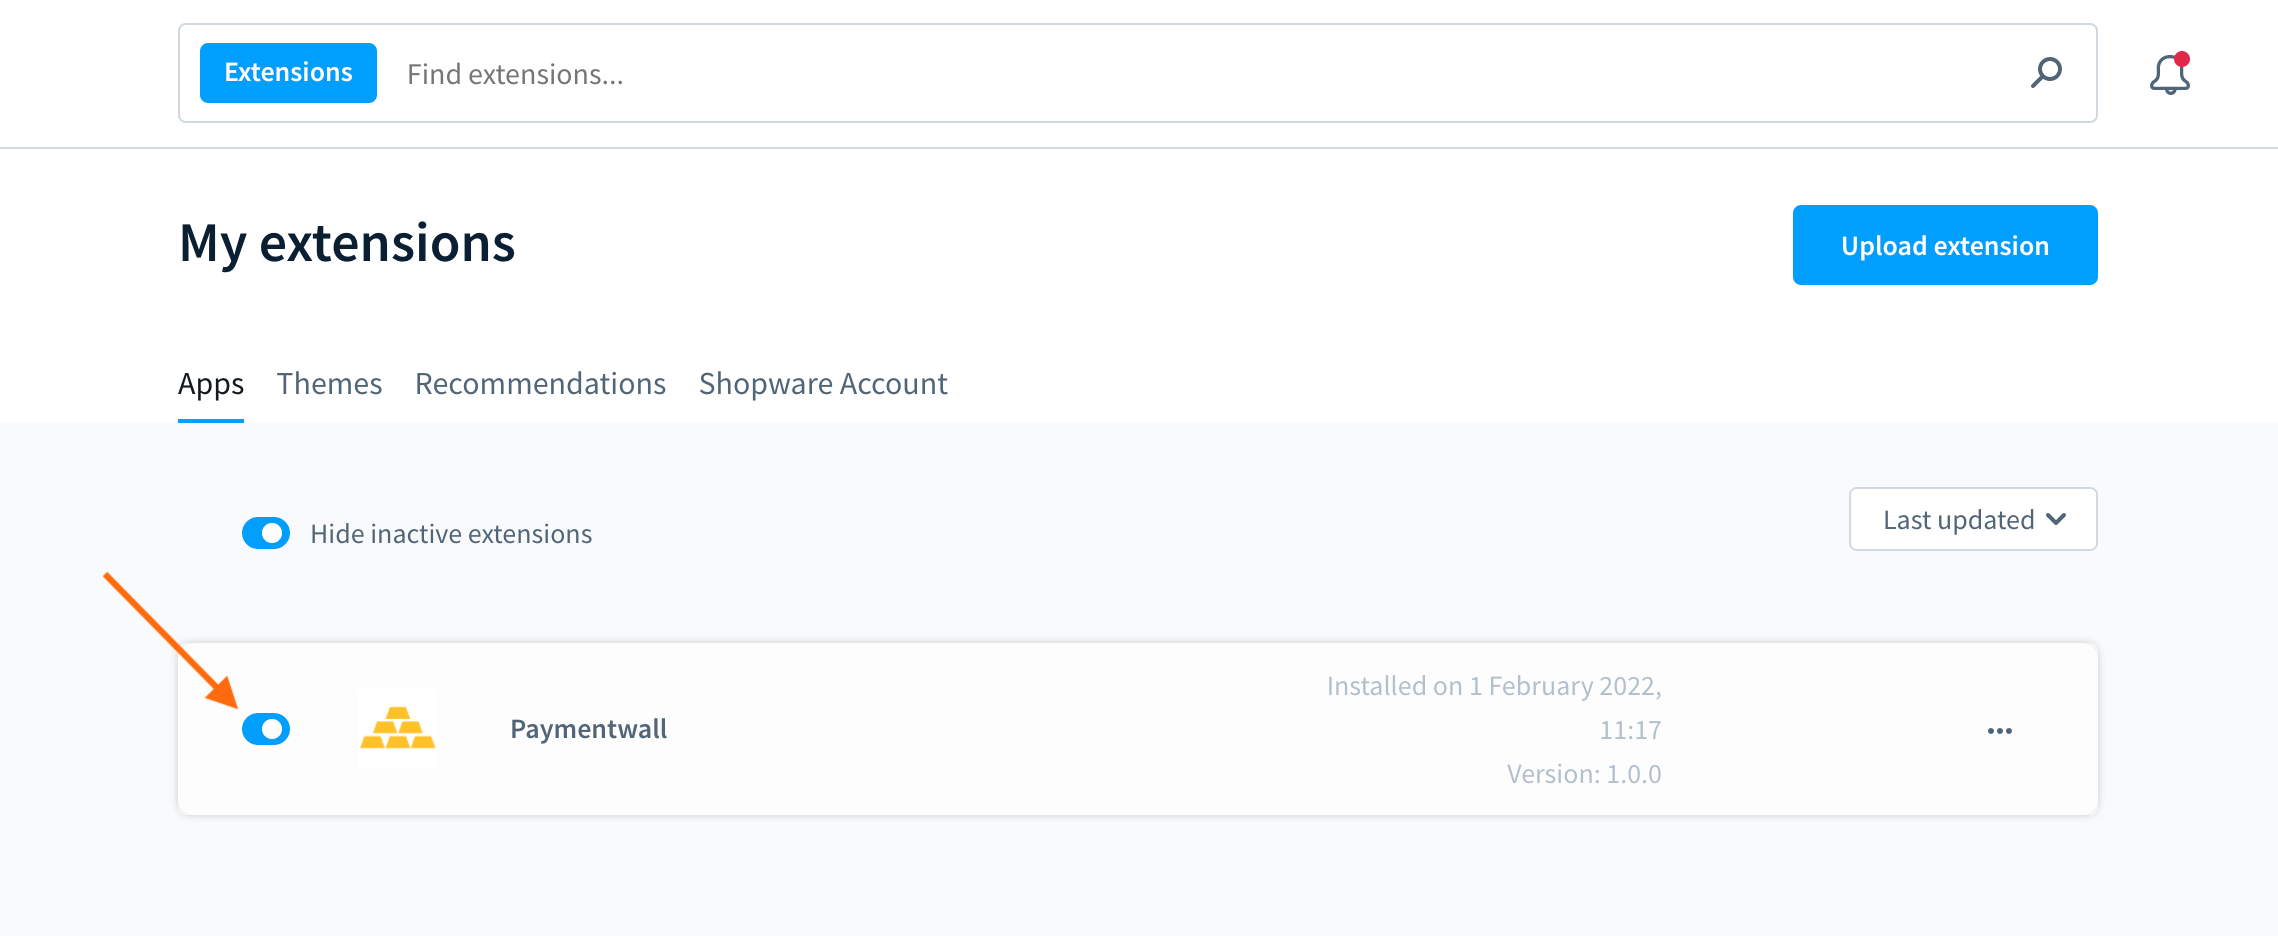
- Install the plugin in your Shopware Admin under Extensions → My Extensions
- Turn on the Activate toggle
Step 3: Configure the project in Paymentwall
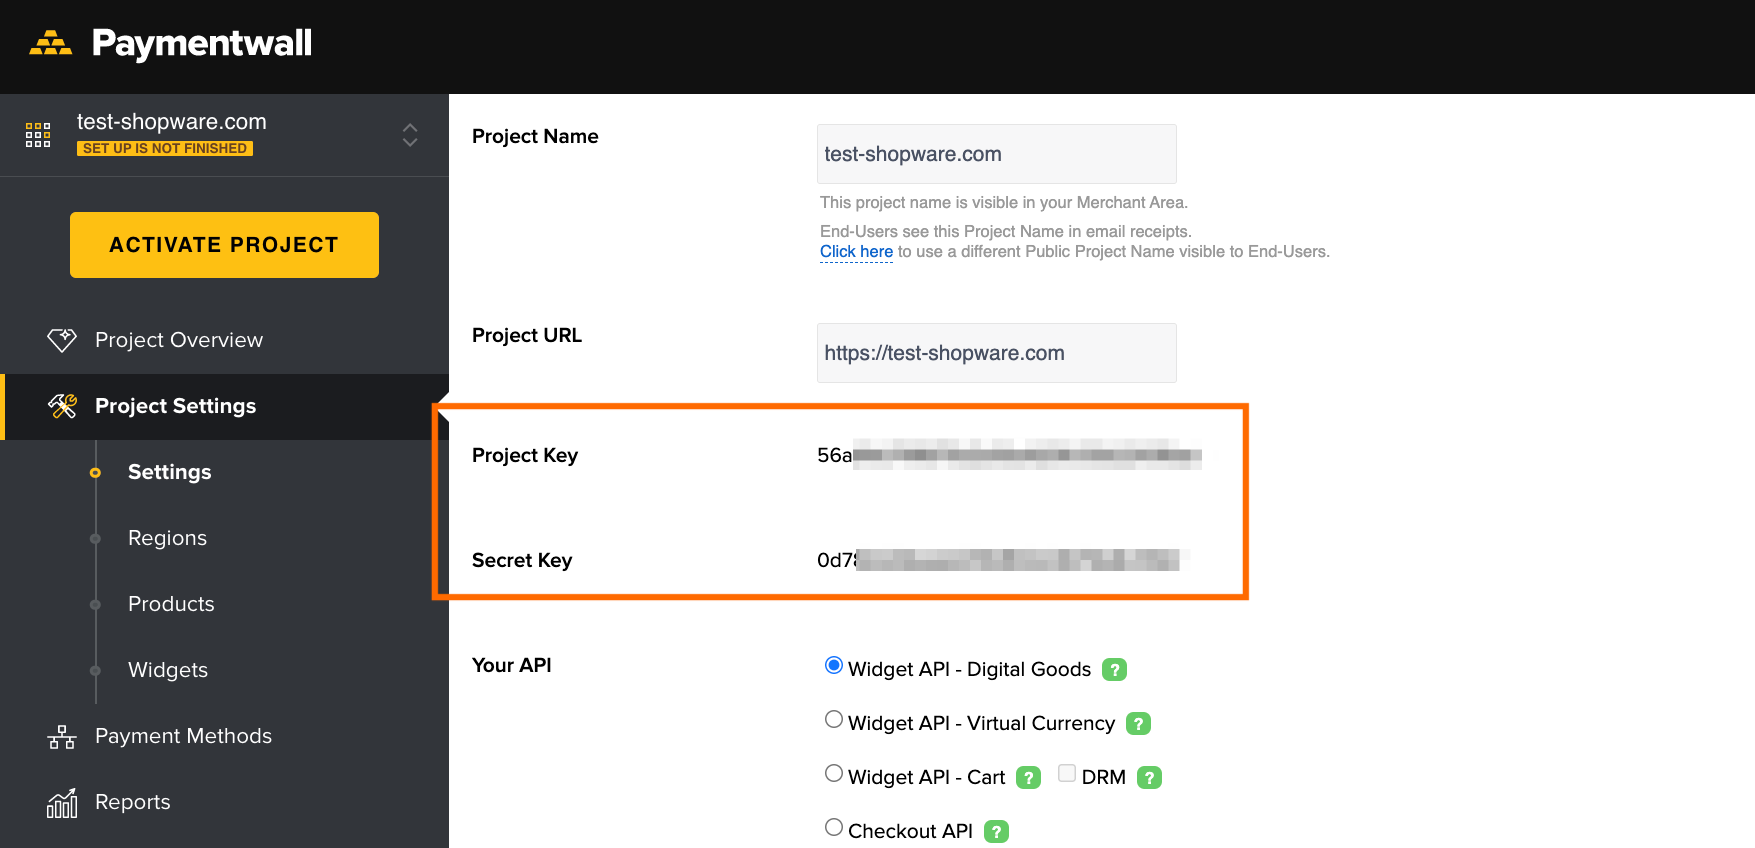
- Login to your Paymentwall merchant account
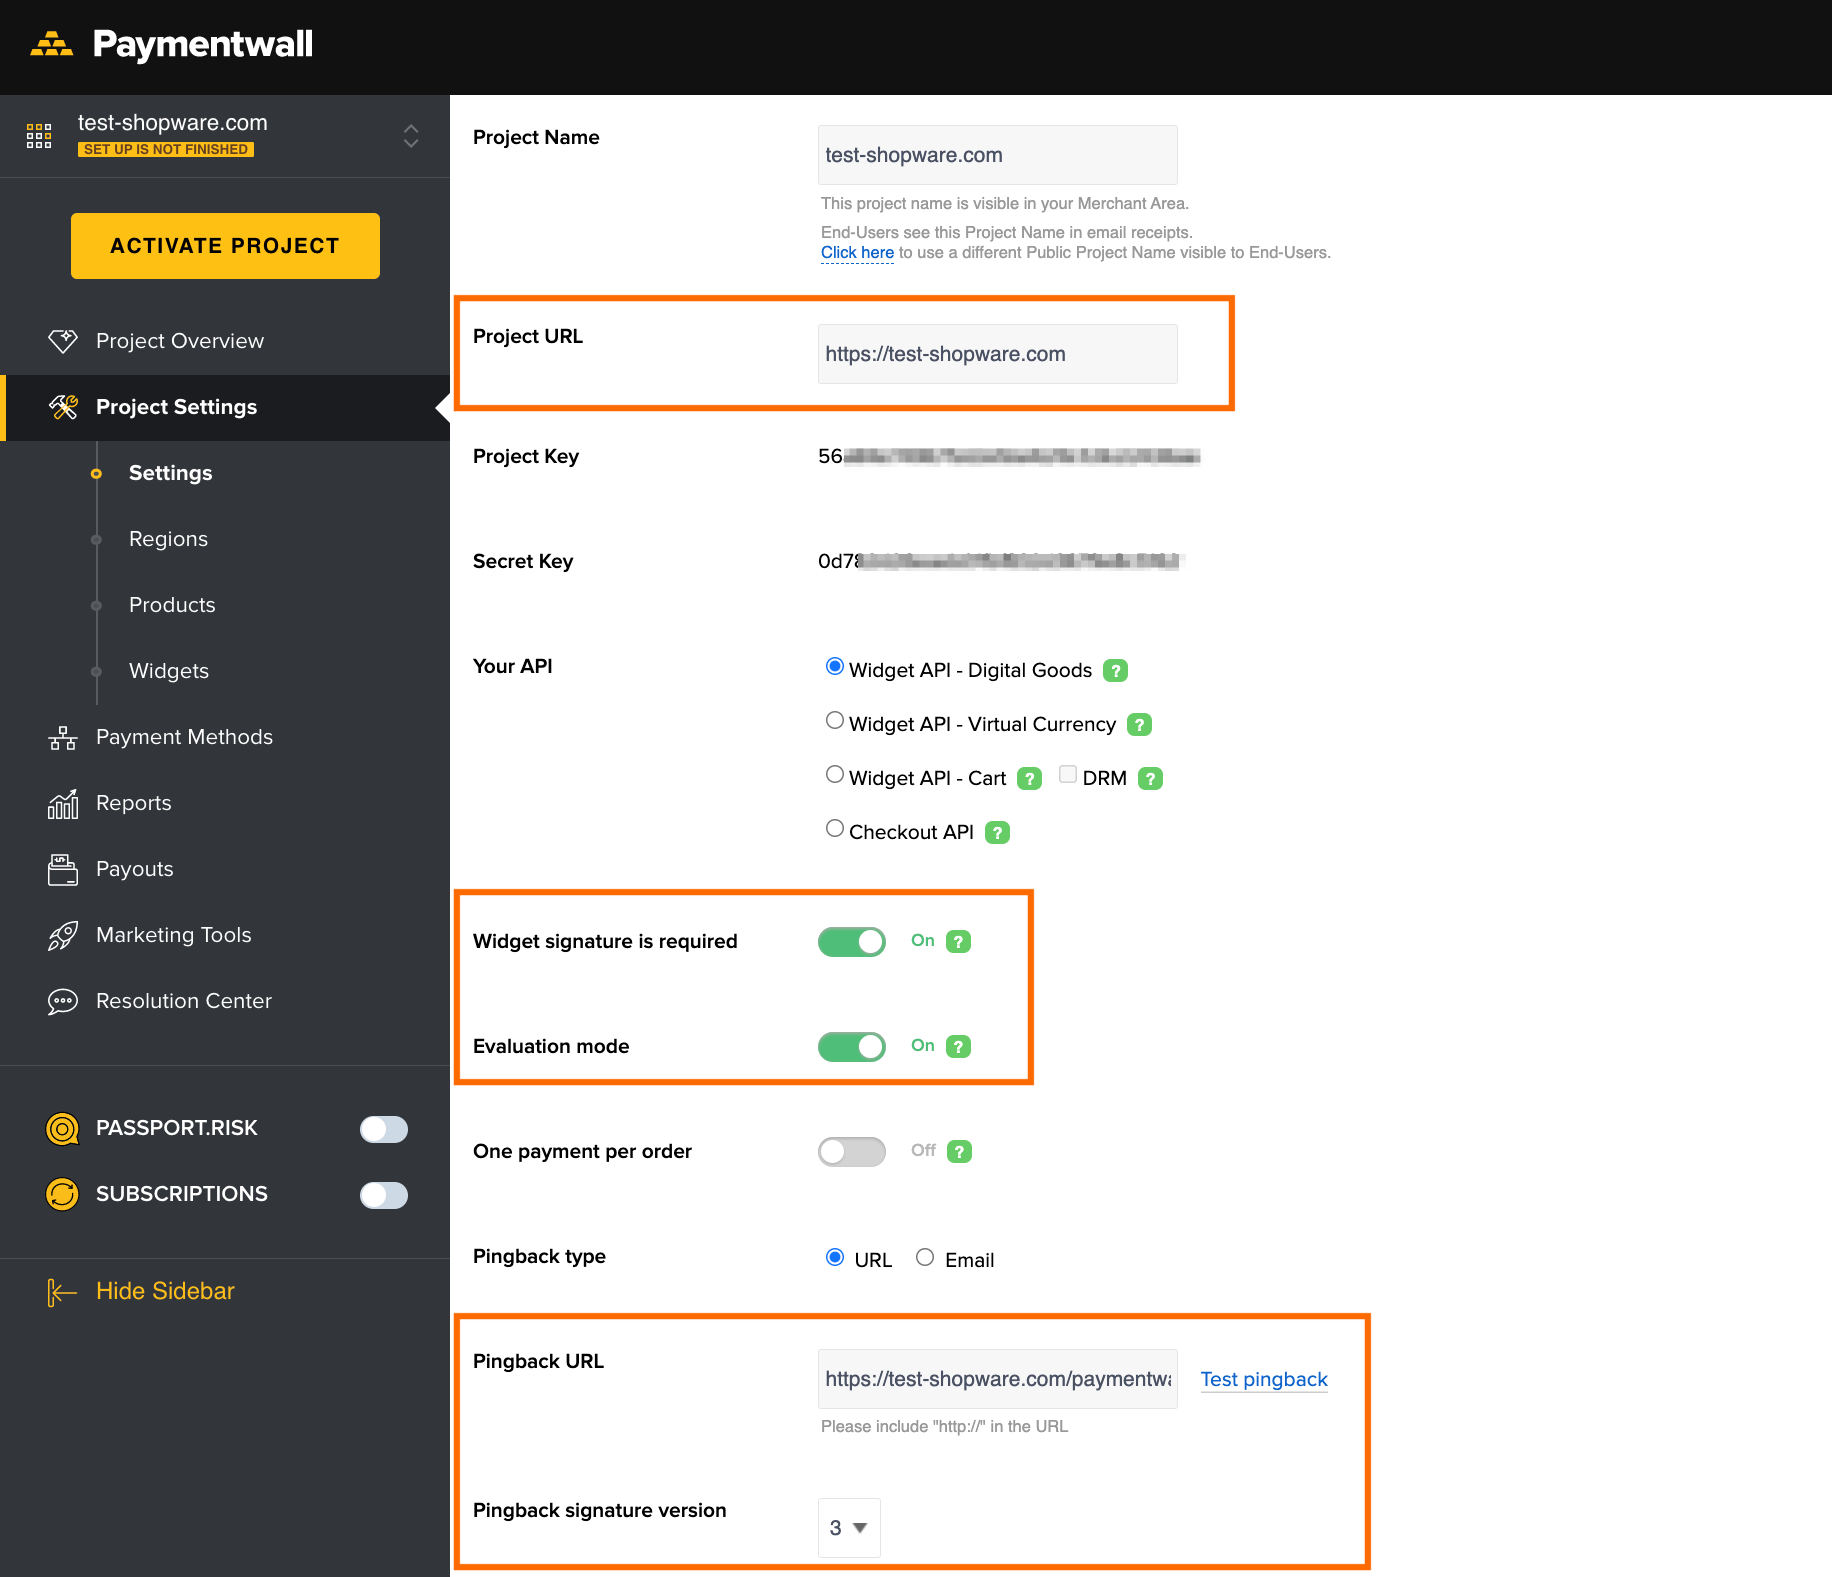
- Go to Project Settings → Settings
- Make sure that Project URL is a correct URL of your Shopware store
- Turn on the Widget signature is required toggle
- Turn on the Evaluation mode toggle
- Set Pingback type to “URL”
- Set Pingback URL to “http[s]://[your-domain]/paymentwallPingback”. Example: https://test-shopware.com/paymentwallPingback
- Set Pingback signature version to “3”
- Click Save changes.
Do not close this page, as you will need it for further configuration steps
Step 4: Configure the Paymentwall plugin in Shopware Admin
- Login to your Shopware admin
- Go to Extensions → My Extensions
- Find Paymentwall in the apps list, and click … → Configure in the right part of the row
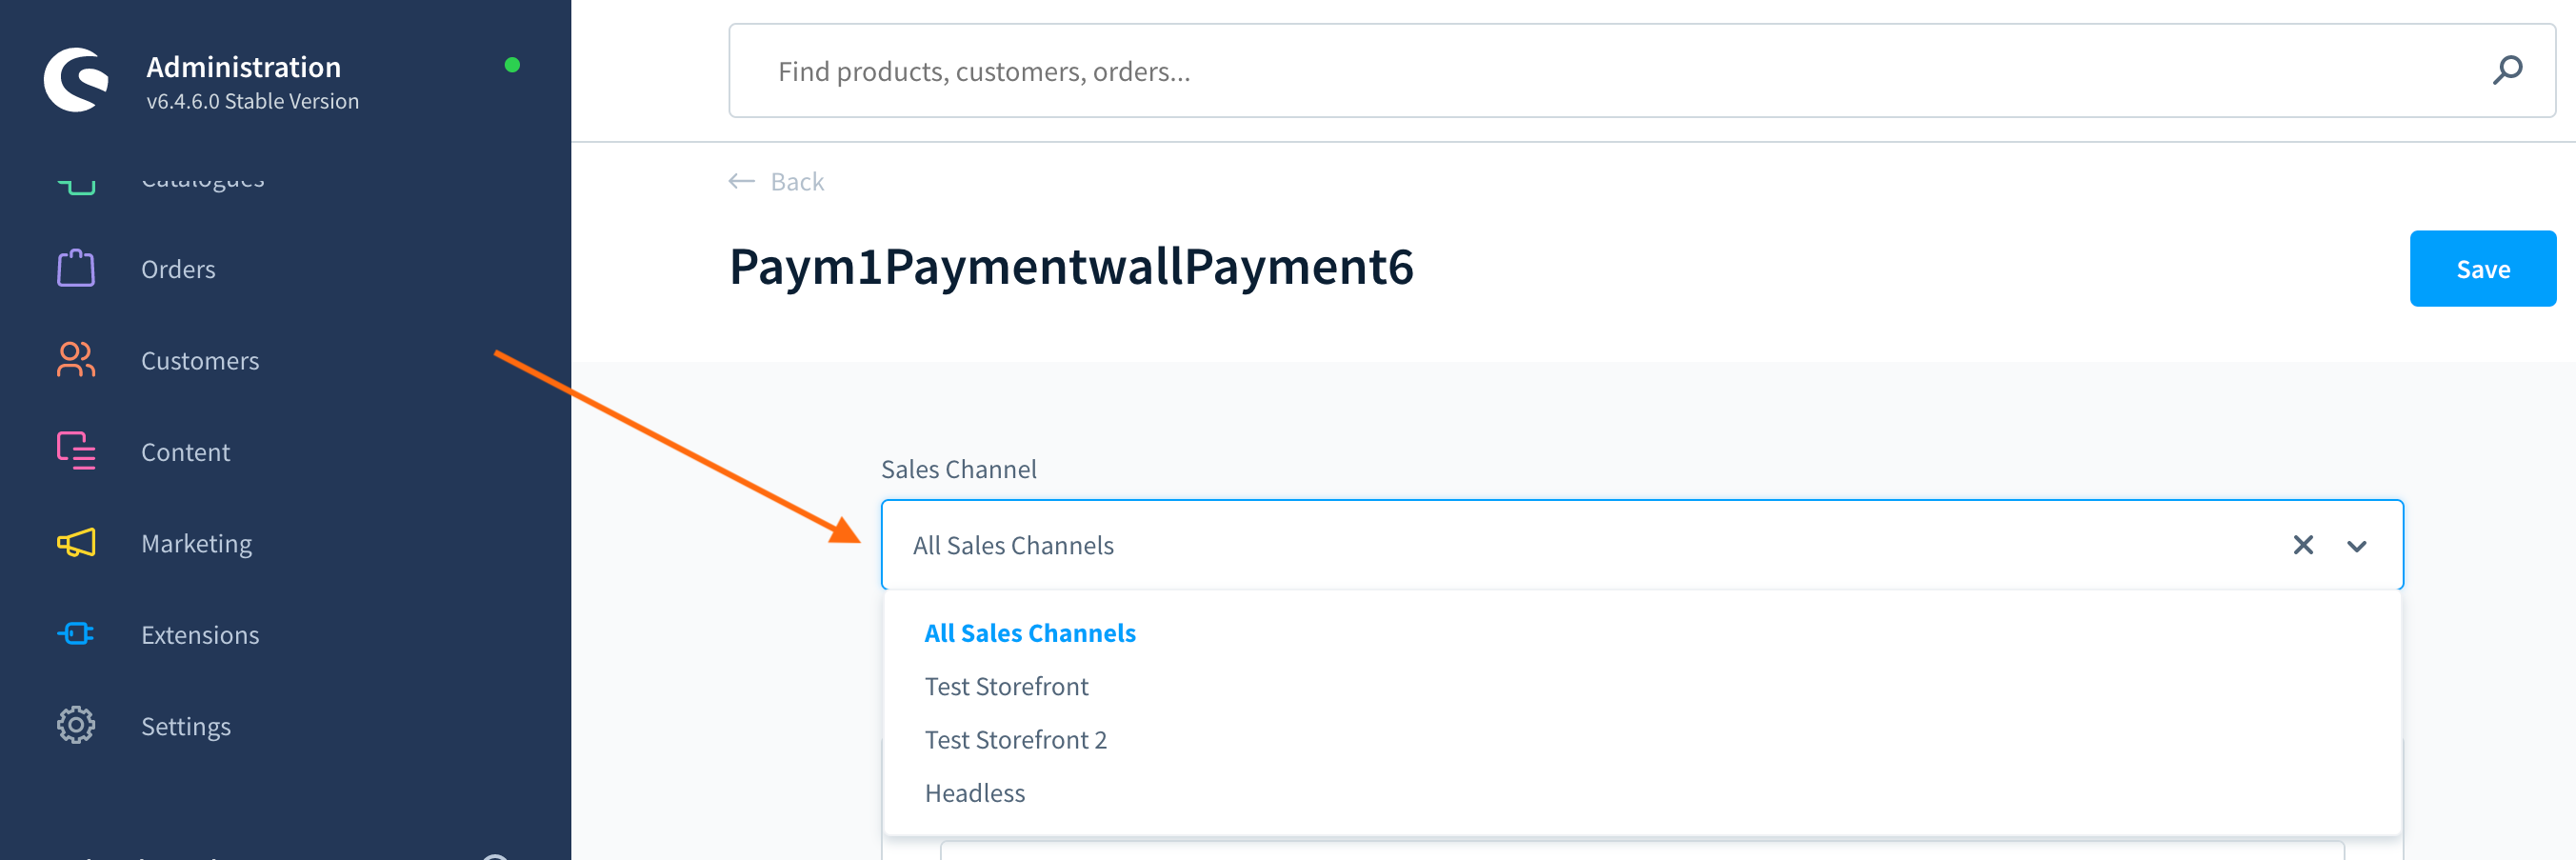
- Select the Sales Channel you would like to configure (All Sales Channels of the specific one)
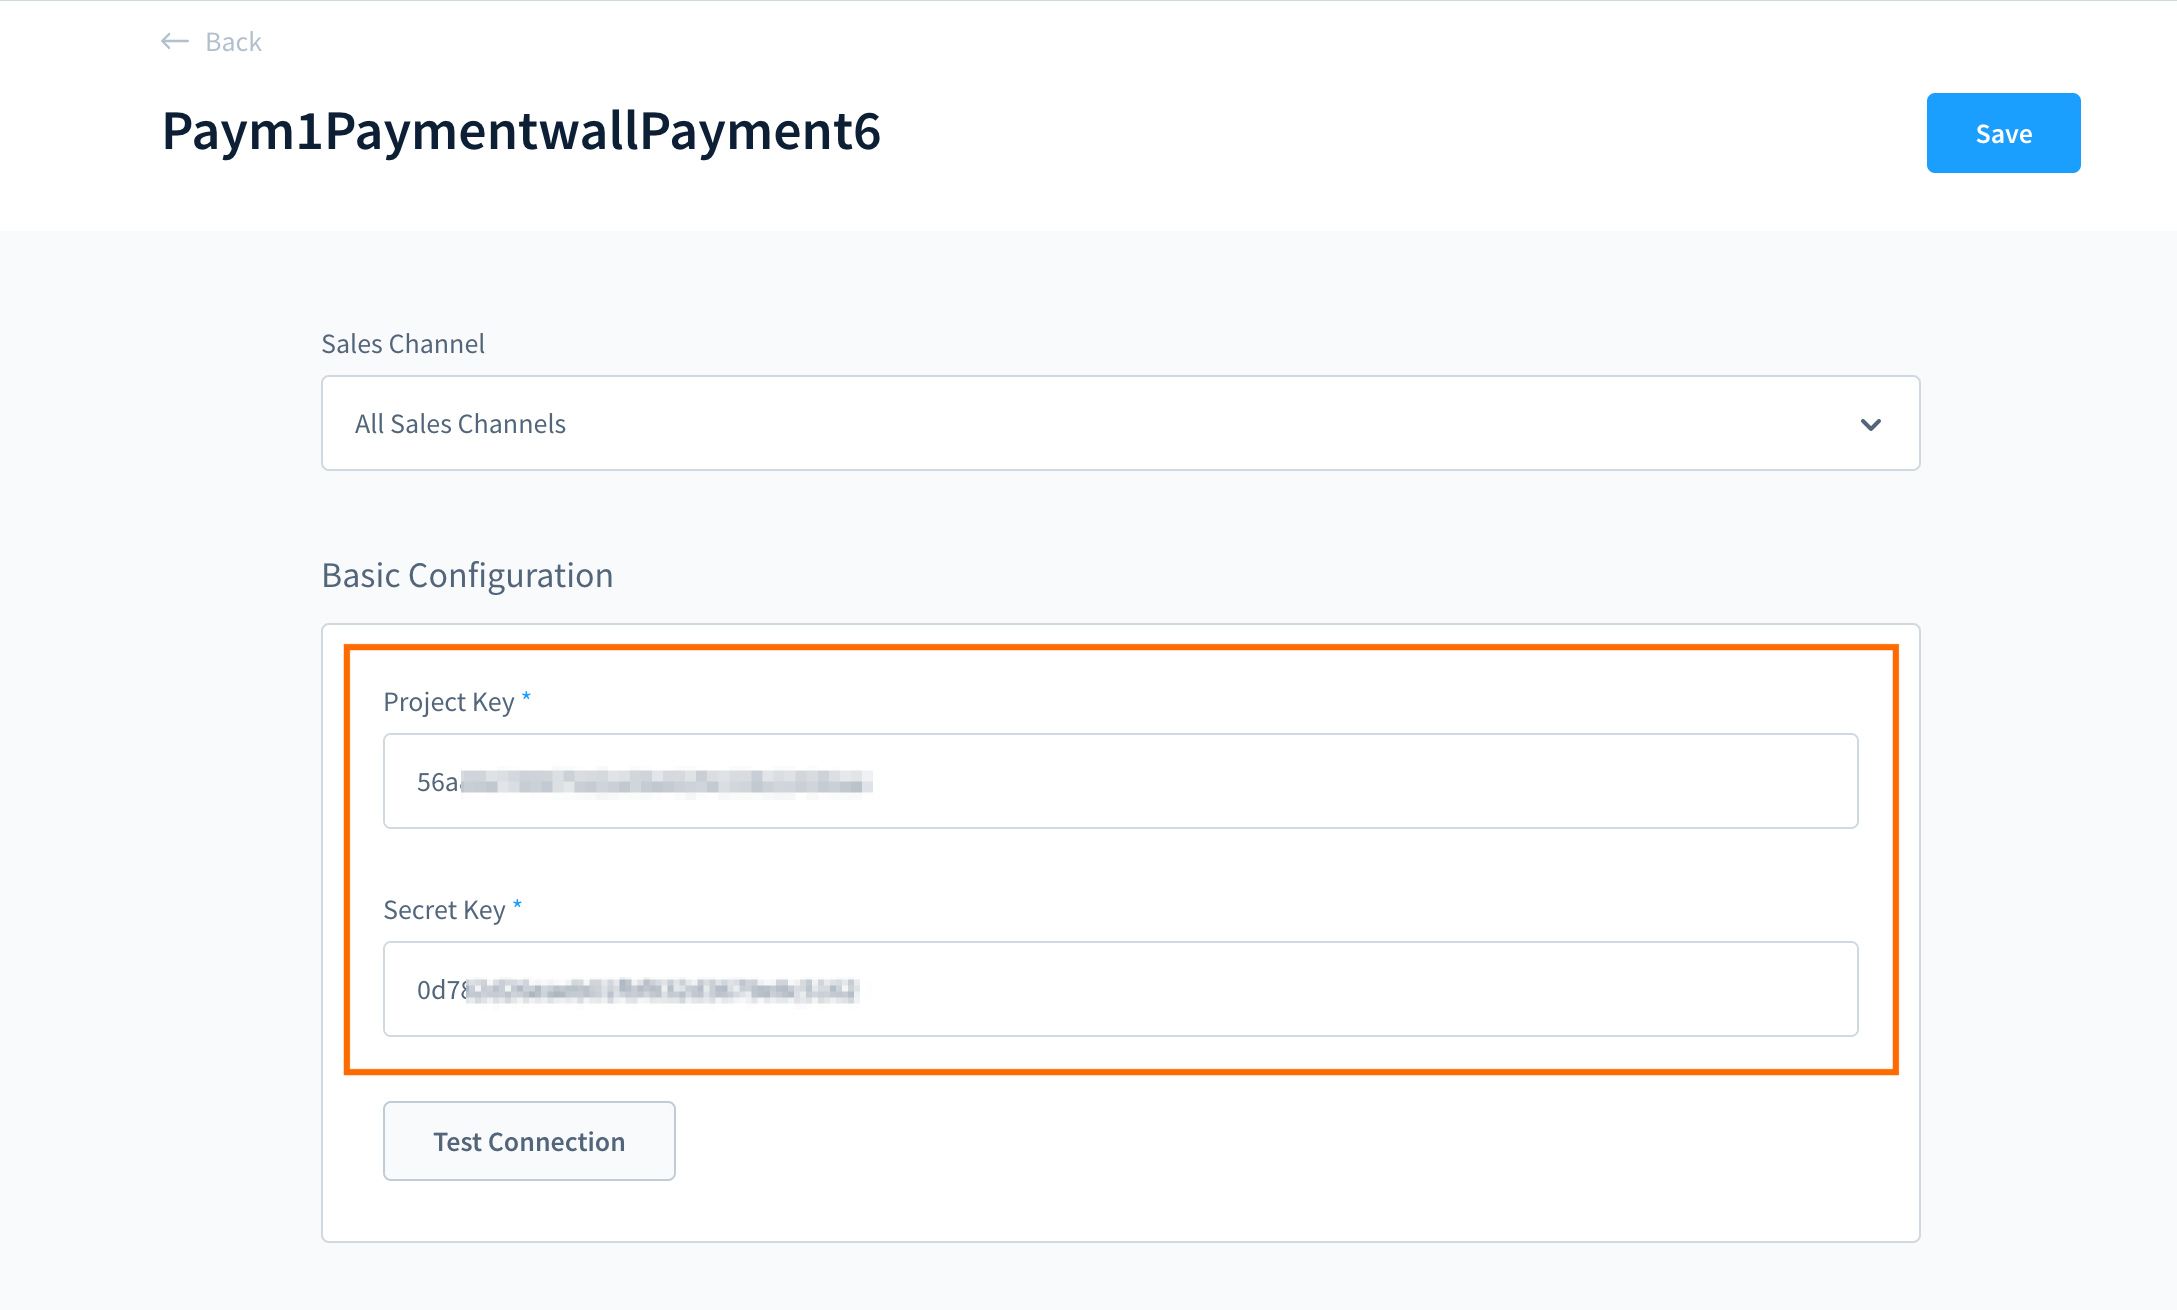
- Copy the following settings from your Paymentwall project and paste them to the Basic configuration section:
- Project Key
- Secret Key
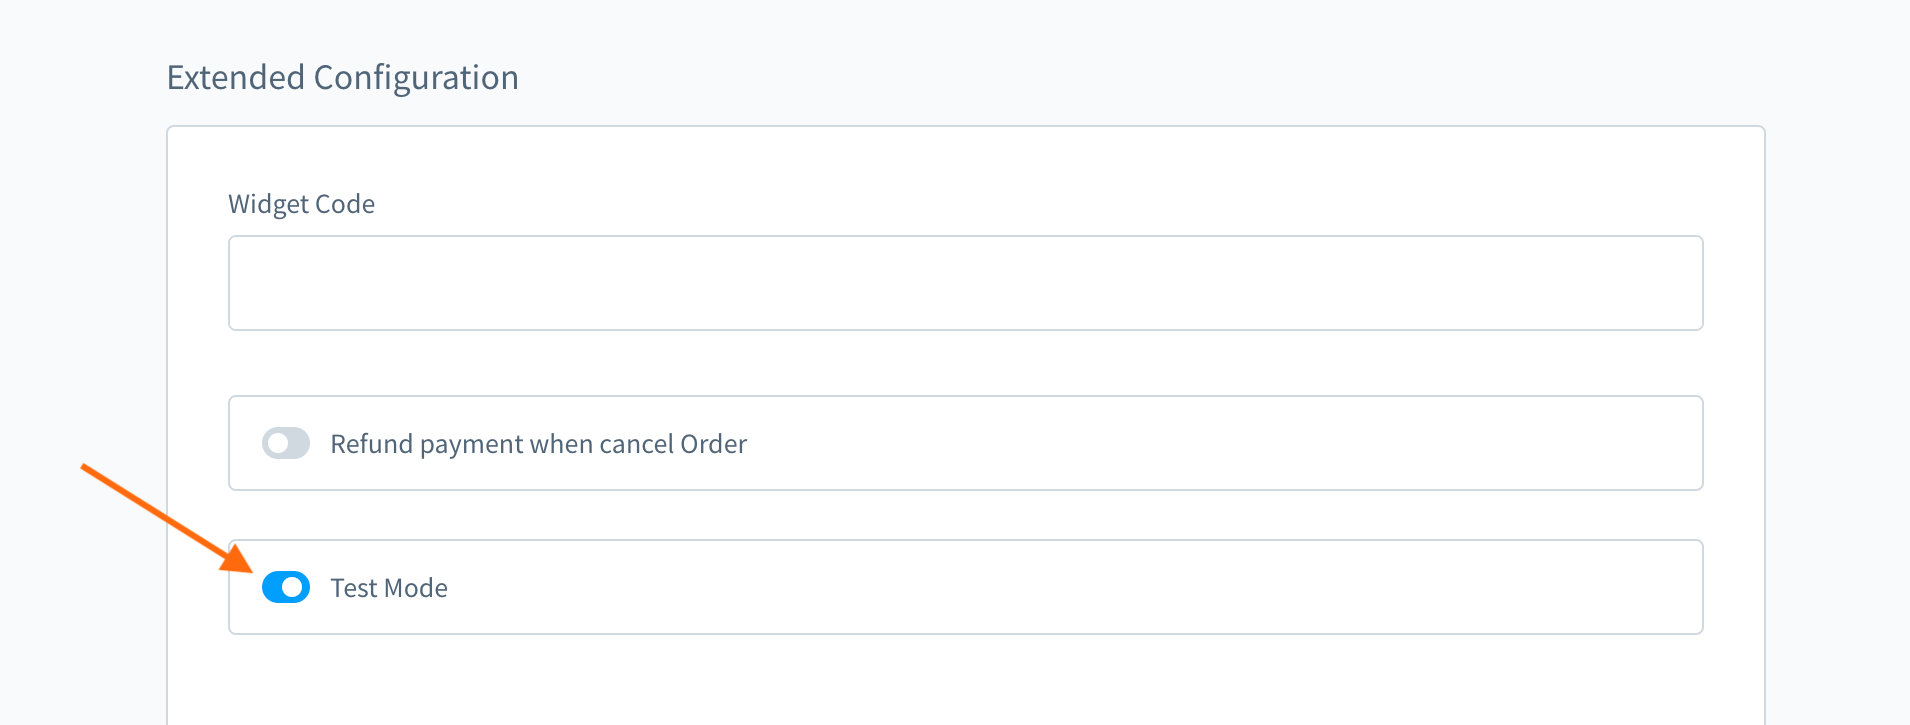
- Additional settings:
- To enable Test payment method - turn on Test Mode toggle
- Click Save button
Step 5: Enable Paymentwall payment method for your storefront
- Go to the Sales Channels and select the storefront
- Scroll down to the Payment and shipping section.
- Select “Paymentwall” in Payment methods dropdown
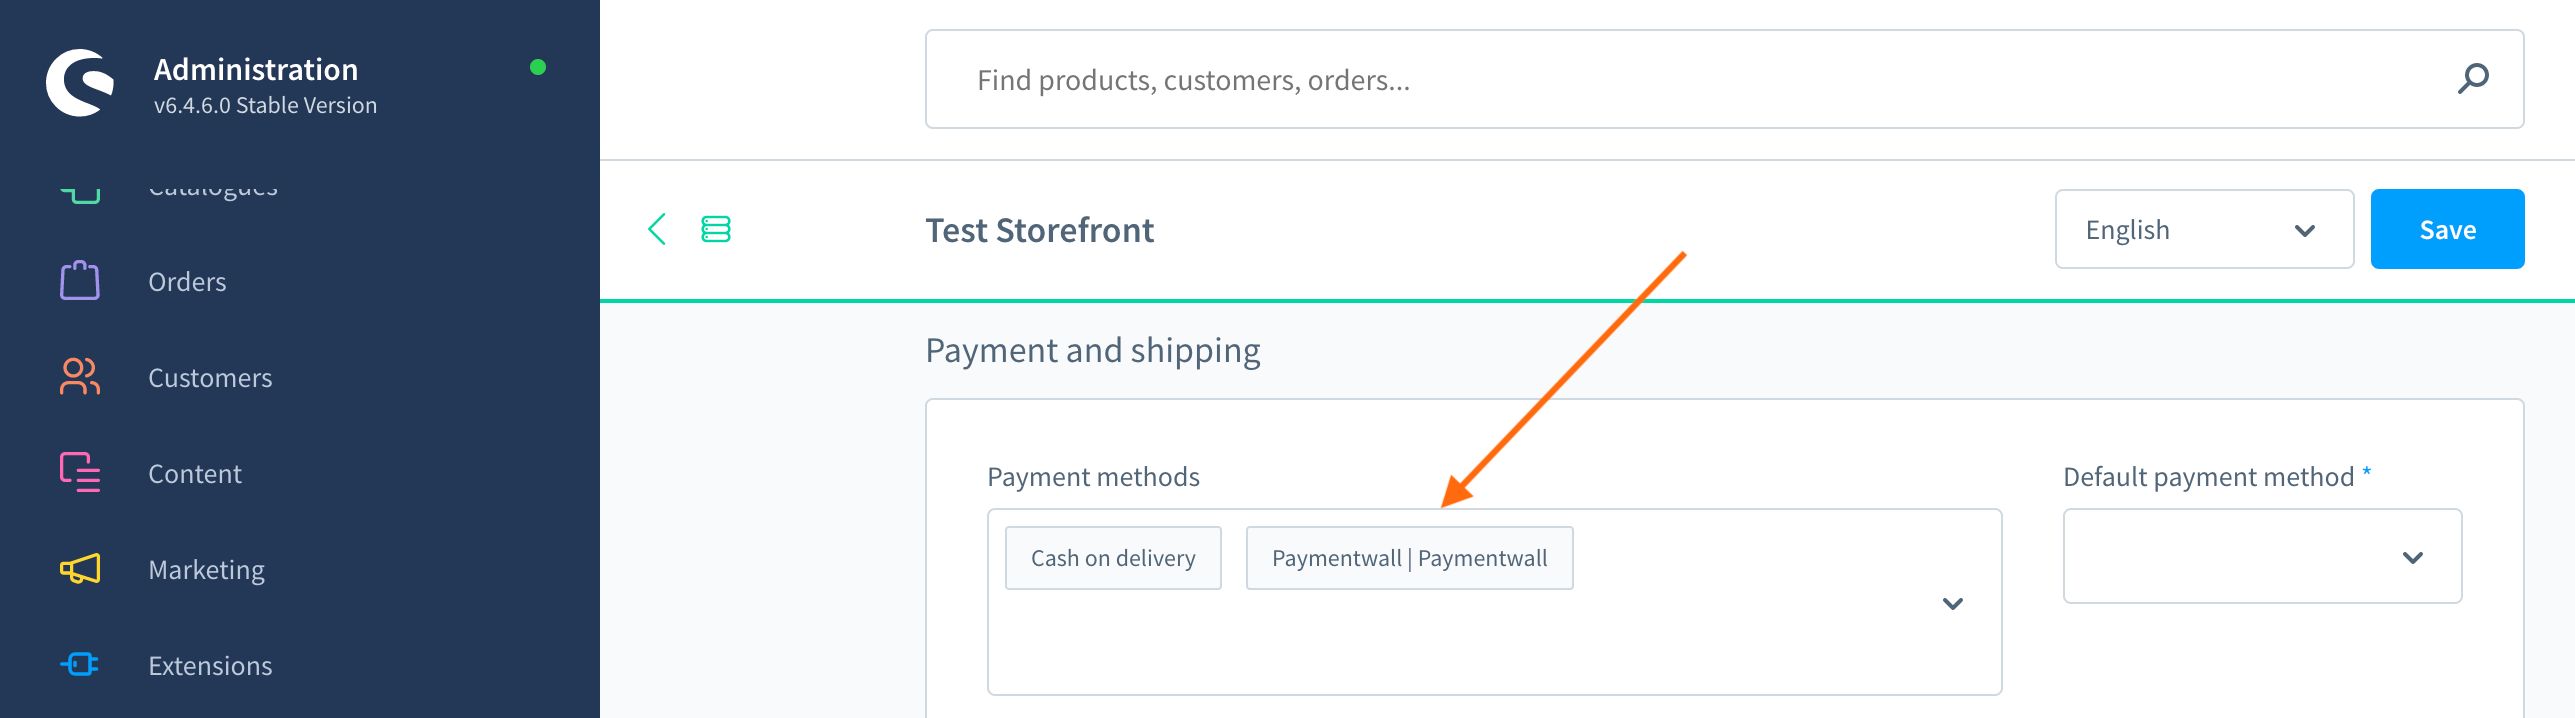
Tip: You can also set Paymentwall as Default payment method

- Click Save button
Step 6: Let’s Go Live!
You can start to test payments of your projects.
Once you make sure everything works smoothly, please submit your project to go live.
Support
-
Paymentwall provides support for all up-to-date Shopware versions.
-
The list of available Payment Methods can be discovered here.
Contact integration@paymentwall.com if you find the version of your Shopware module is not supported.