Shopware 5
Paymentwall’s Shopware 5 plug-in is easy to install and configure. With a single integration, all products of your E-commerce business will be monetized with 150+ payment options localized in 75+ currencies and more than 200 countries.
Prerequisites
- Sign up for a Paymentwall merchant account using this link: Sign up with Shopware
Step 1: Set up your shop
You can start setting up your shop using the instructions from Shopware’s getting started tutorial.
Step 2: Download Paymentwall plugin
- Download Paymentwall plugin using on of the following options:
- Download the plugin from Shopware App store
For German language version of the page please use this link
- Download the latest version of ZIP archive from GitHub repository.
Please choose ZIP file named Paymentwall-for-shopware-vx.x.x.zip with the highest x.x.x numbers
- Download the plugin from Shopware App store
Step 3: Install and activate Paymentwall plugin
- Log in to Shopware Admin Panel
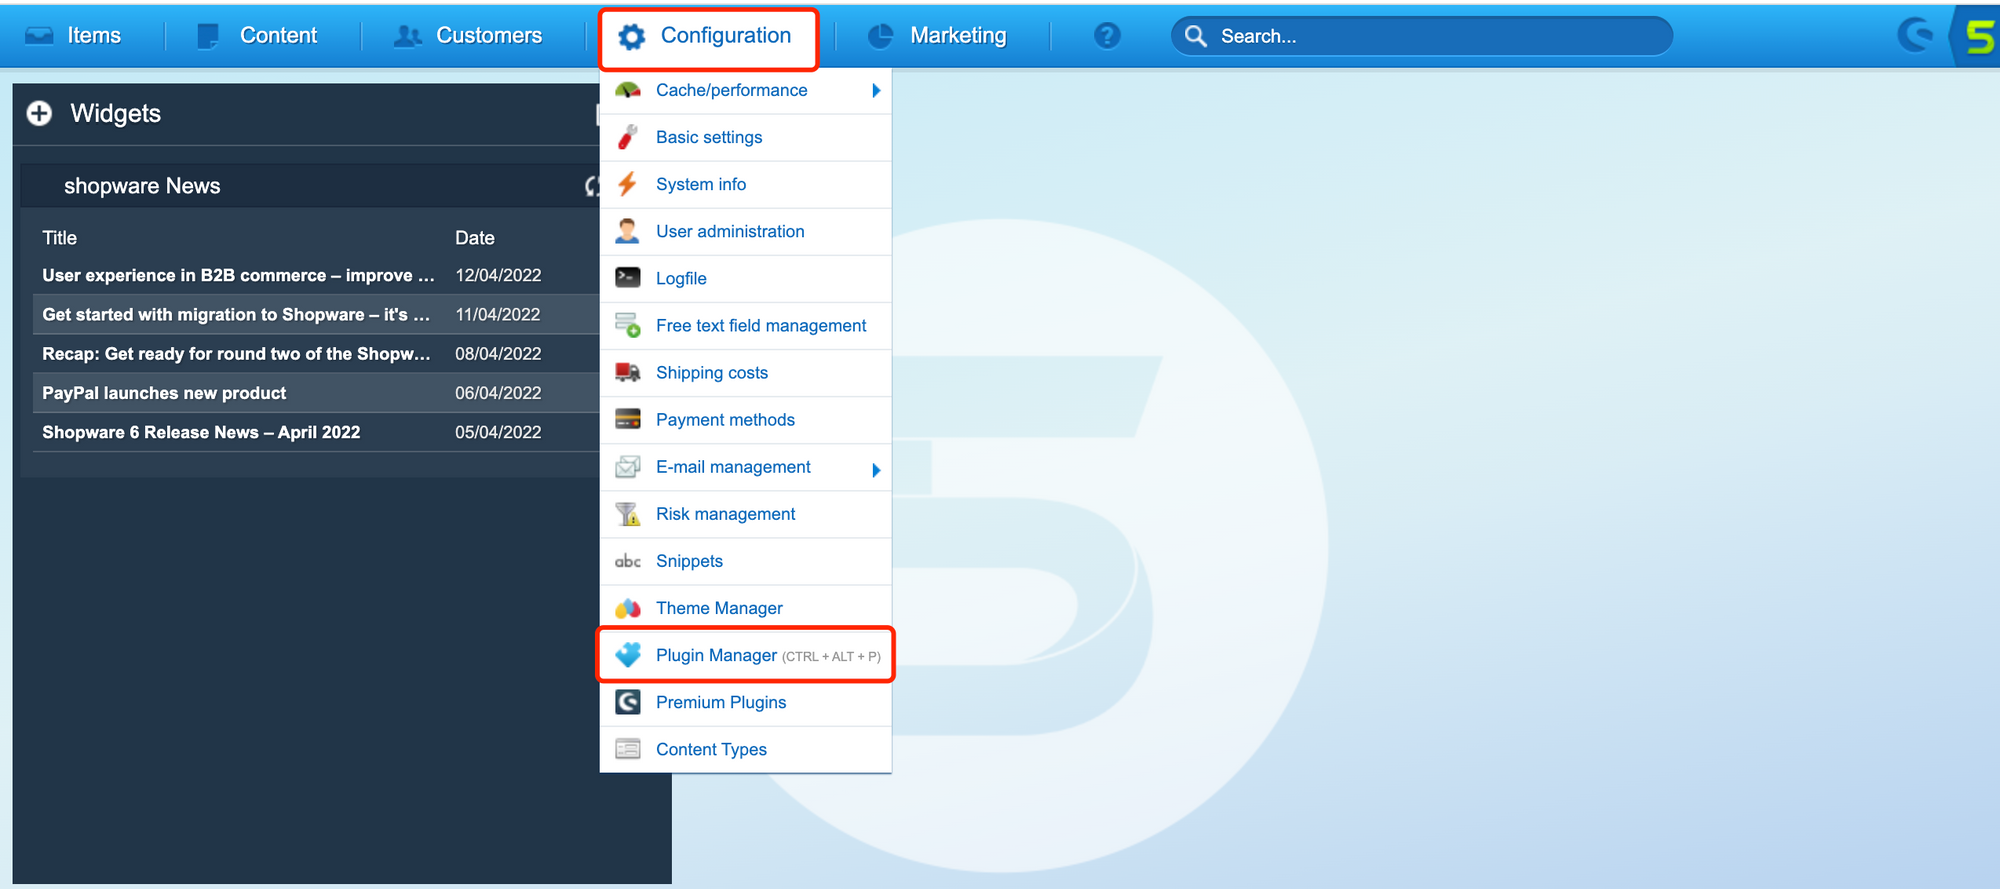
- Go to Configuration → Plugin Manager
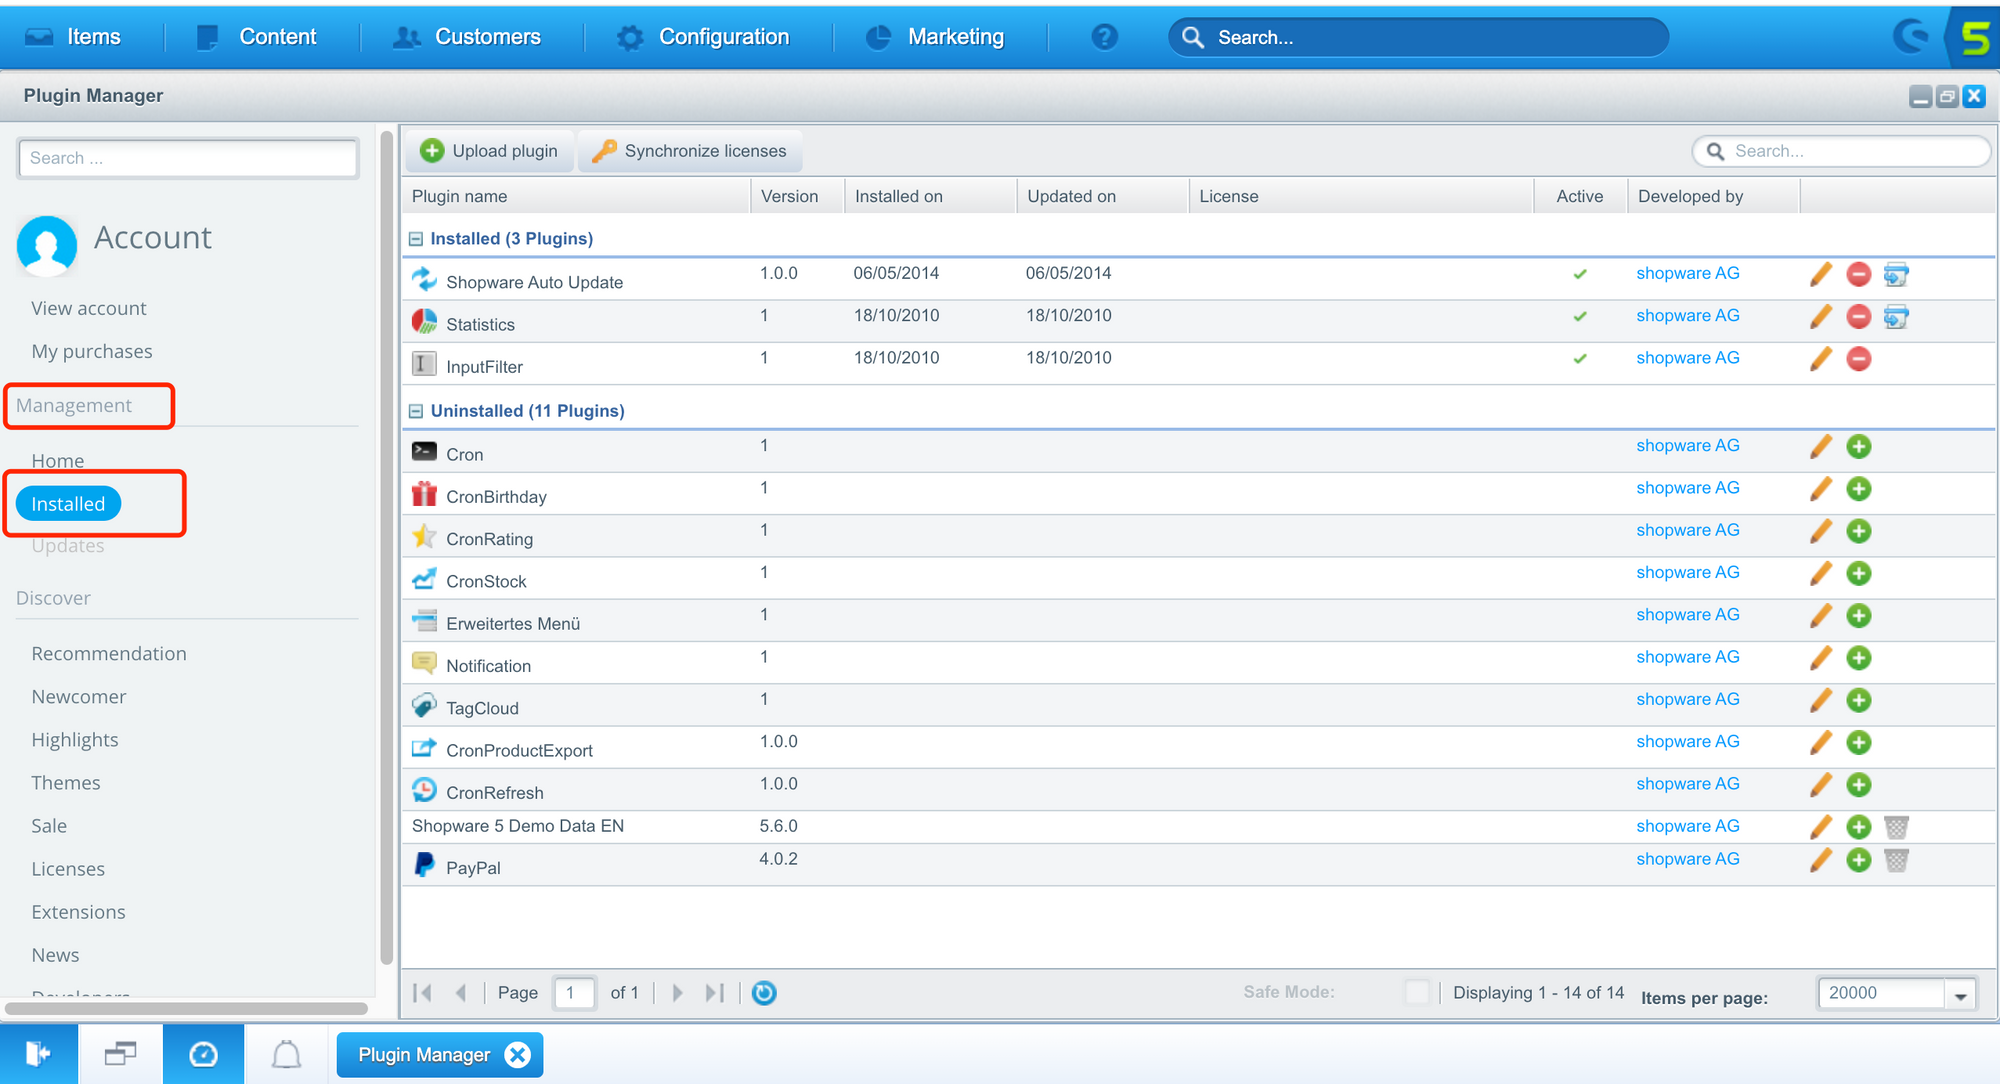
- Go to Management → Installed
- Click Upload plugin

- In the upload dialog select the ZIP file Paymentwall-for-shopware-vx.x.x.zip that you have downloaded before
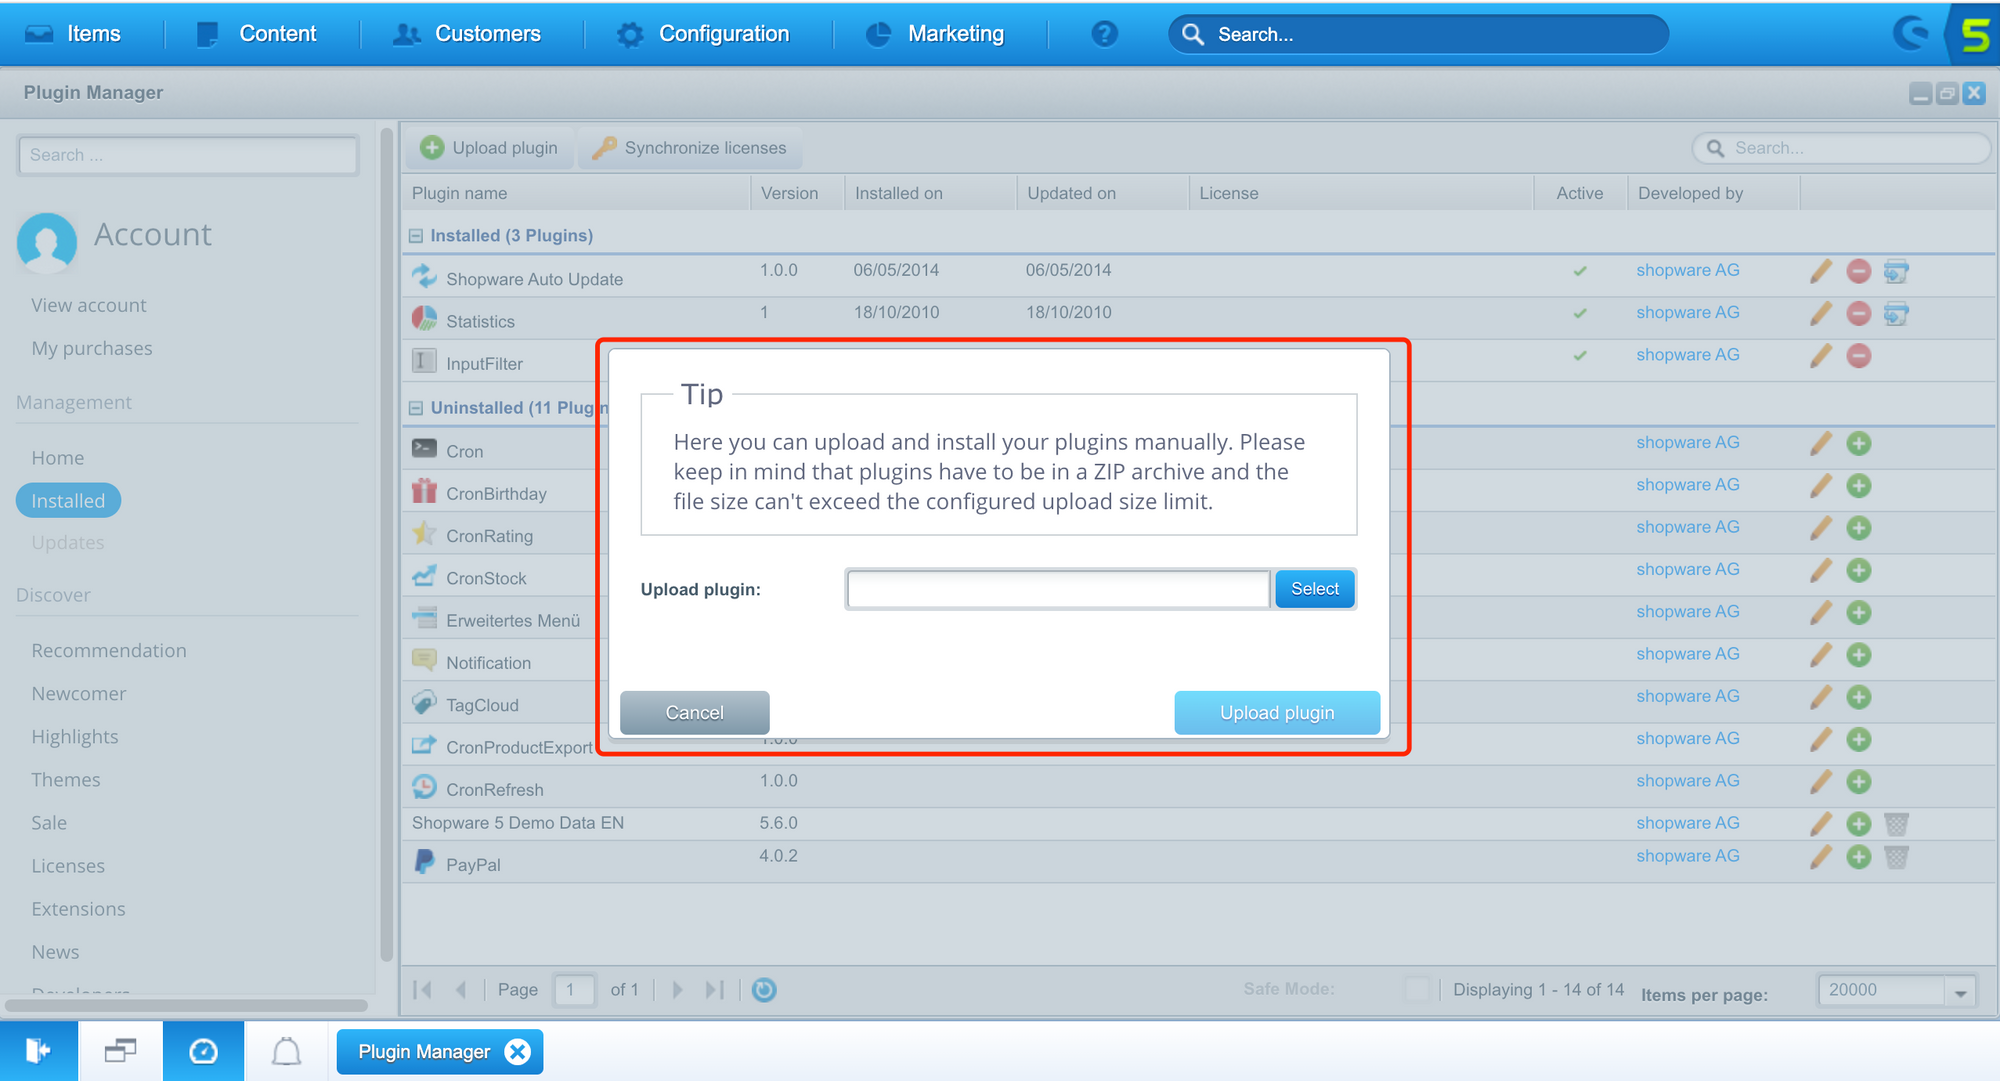
- Click Upload plugin
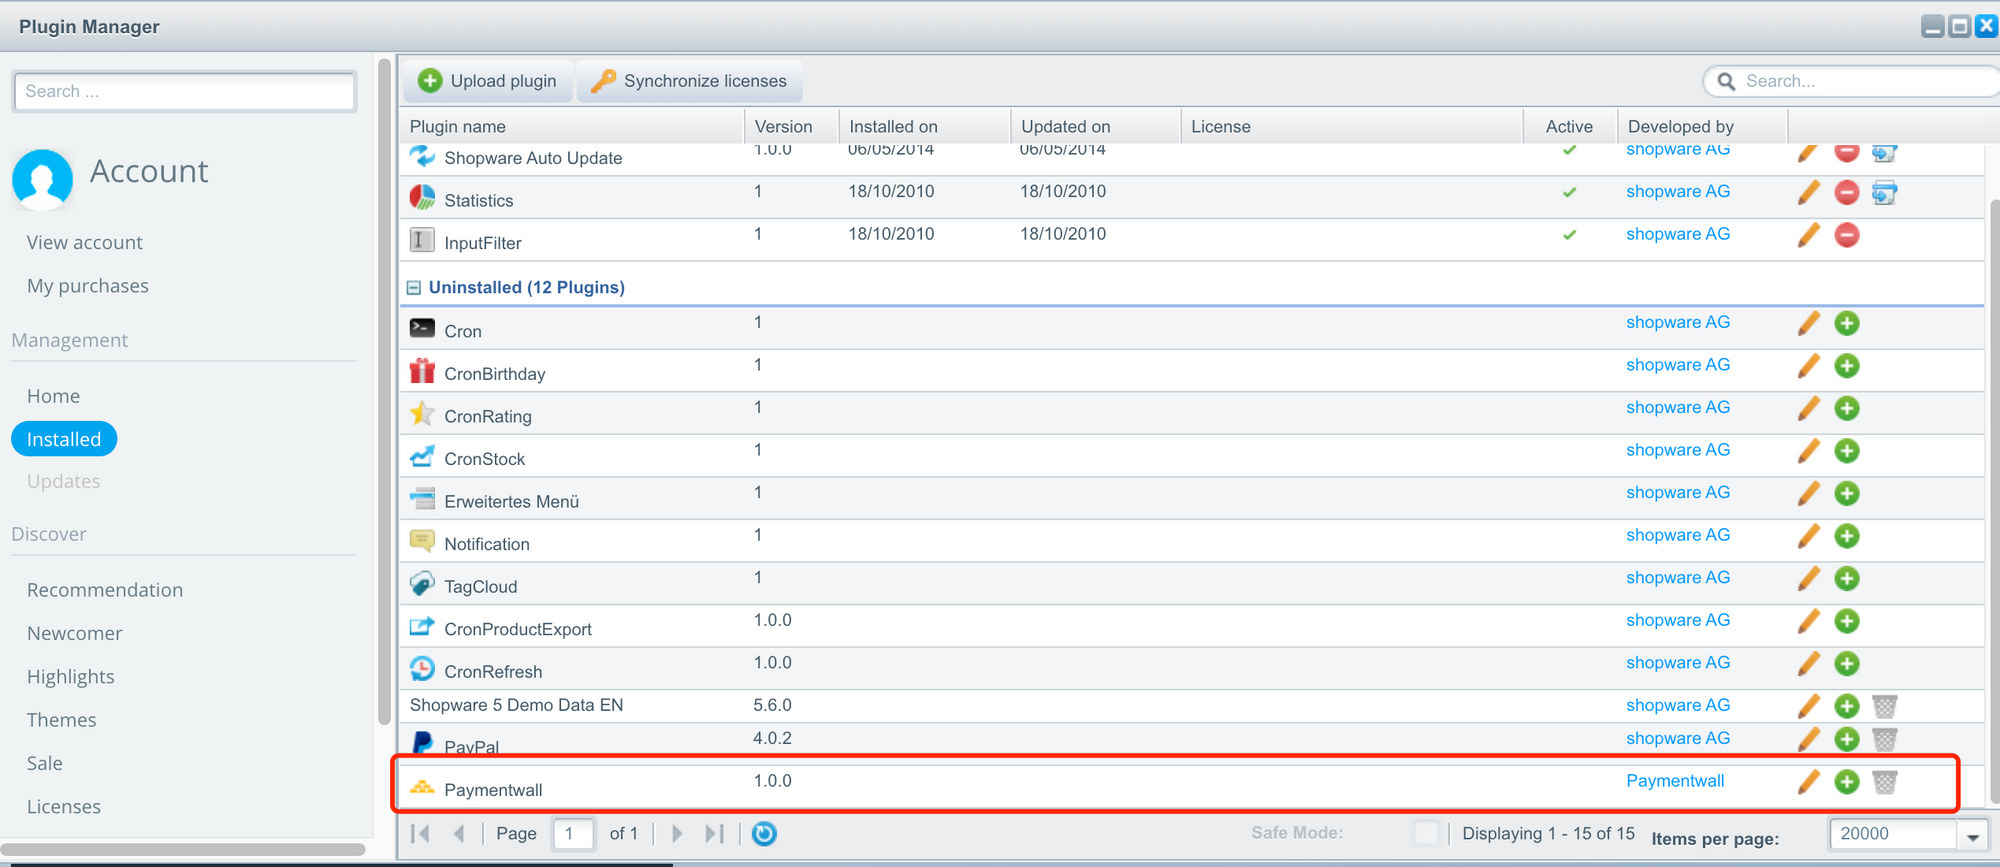
- After the successful upload Paymentwall is listed under “Uninstalled” in the overview of the Plugin Manager.
- To open the uploaded plugin click the Edit icon.
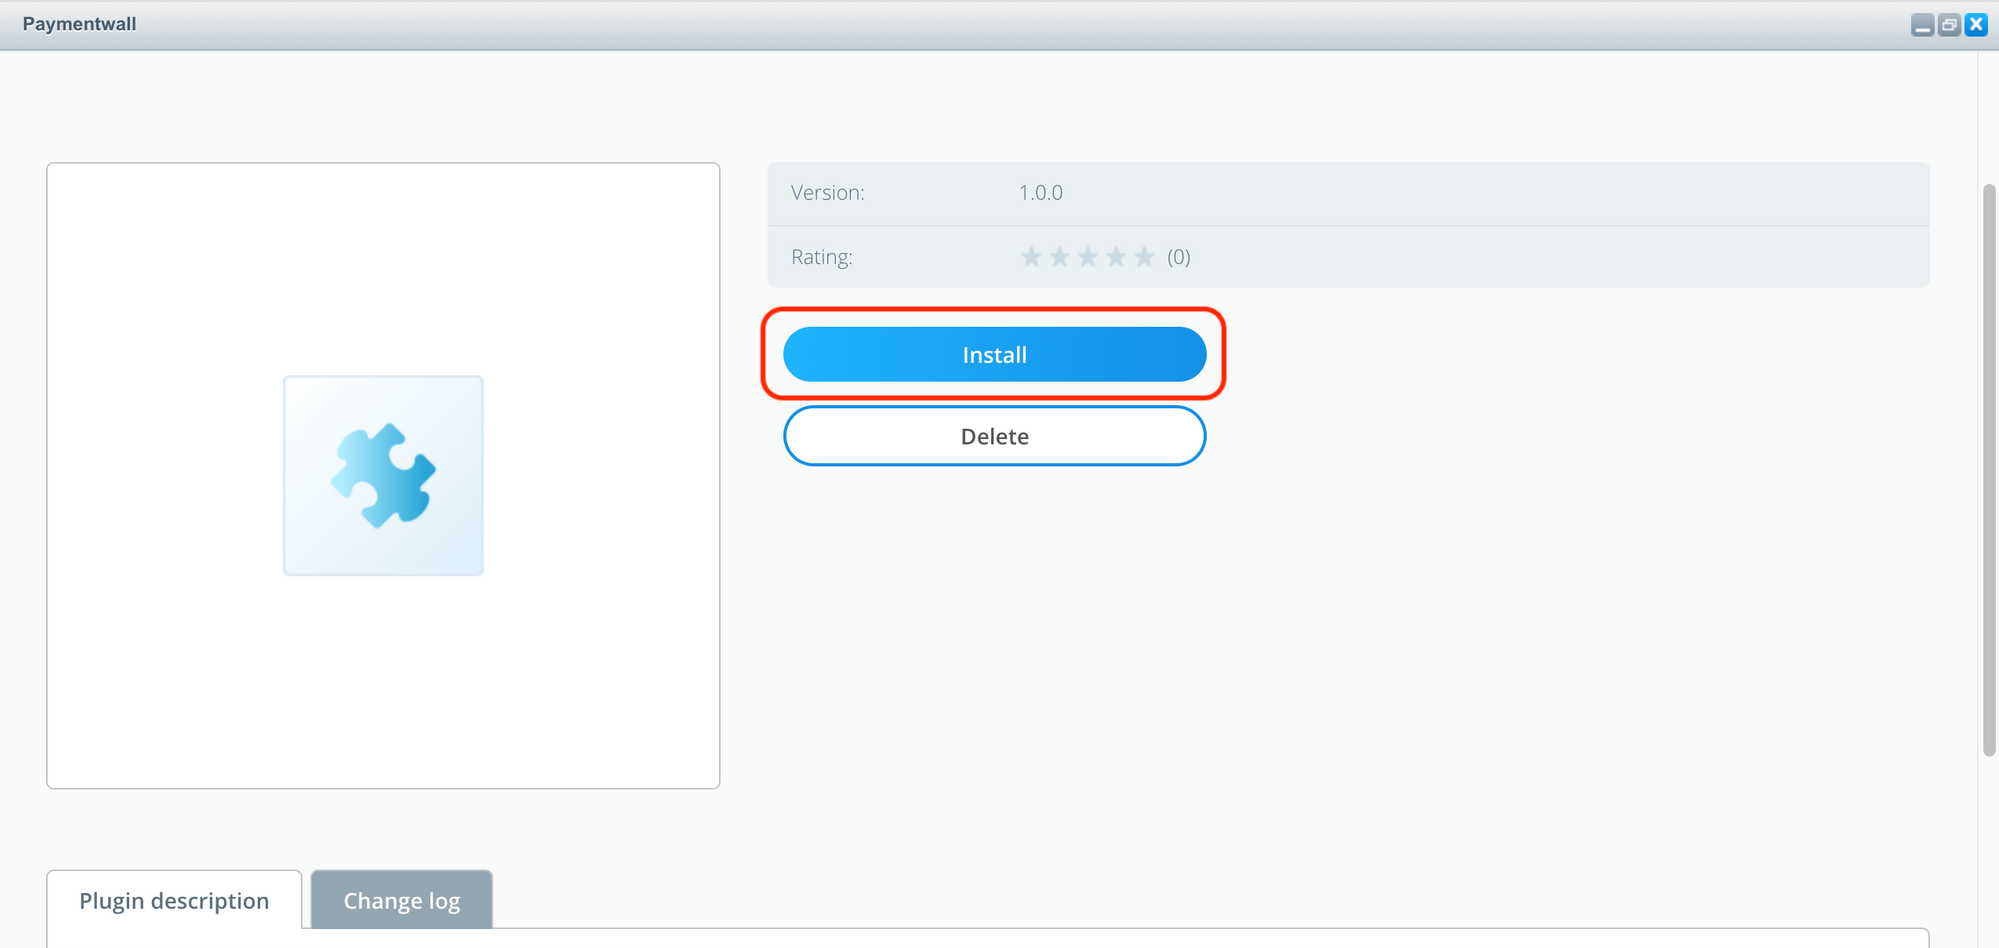
- Click Install button
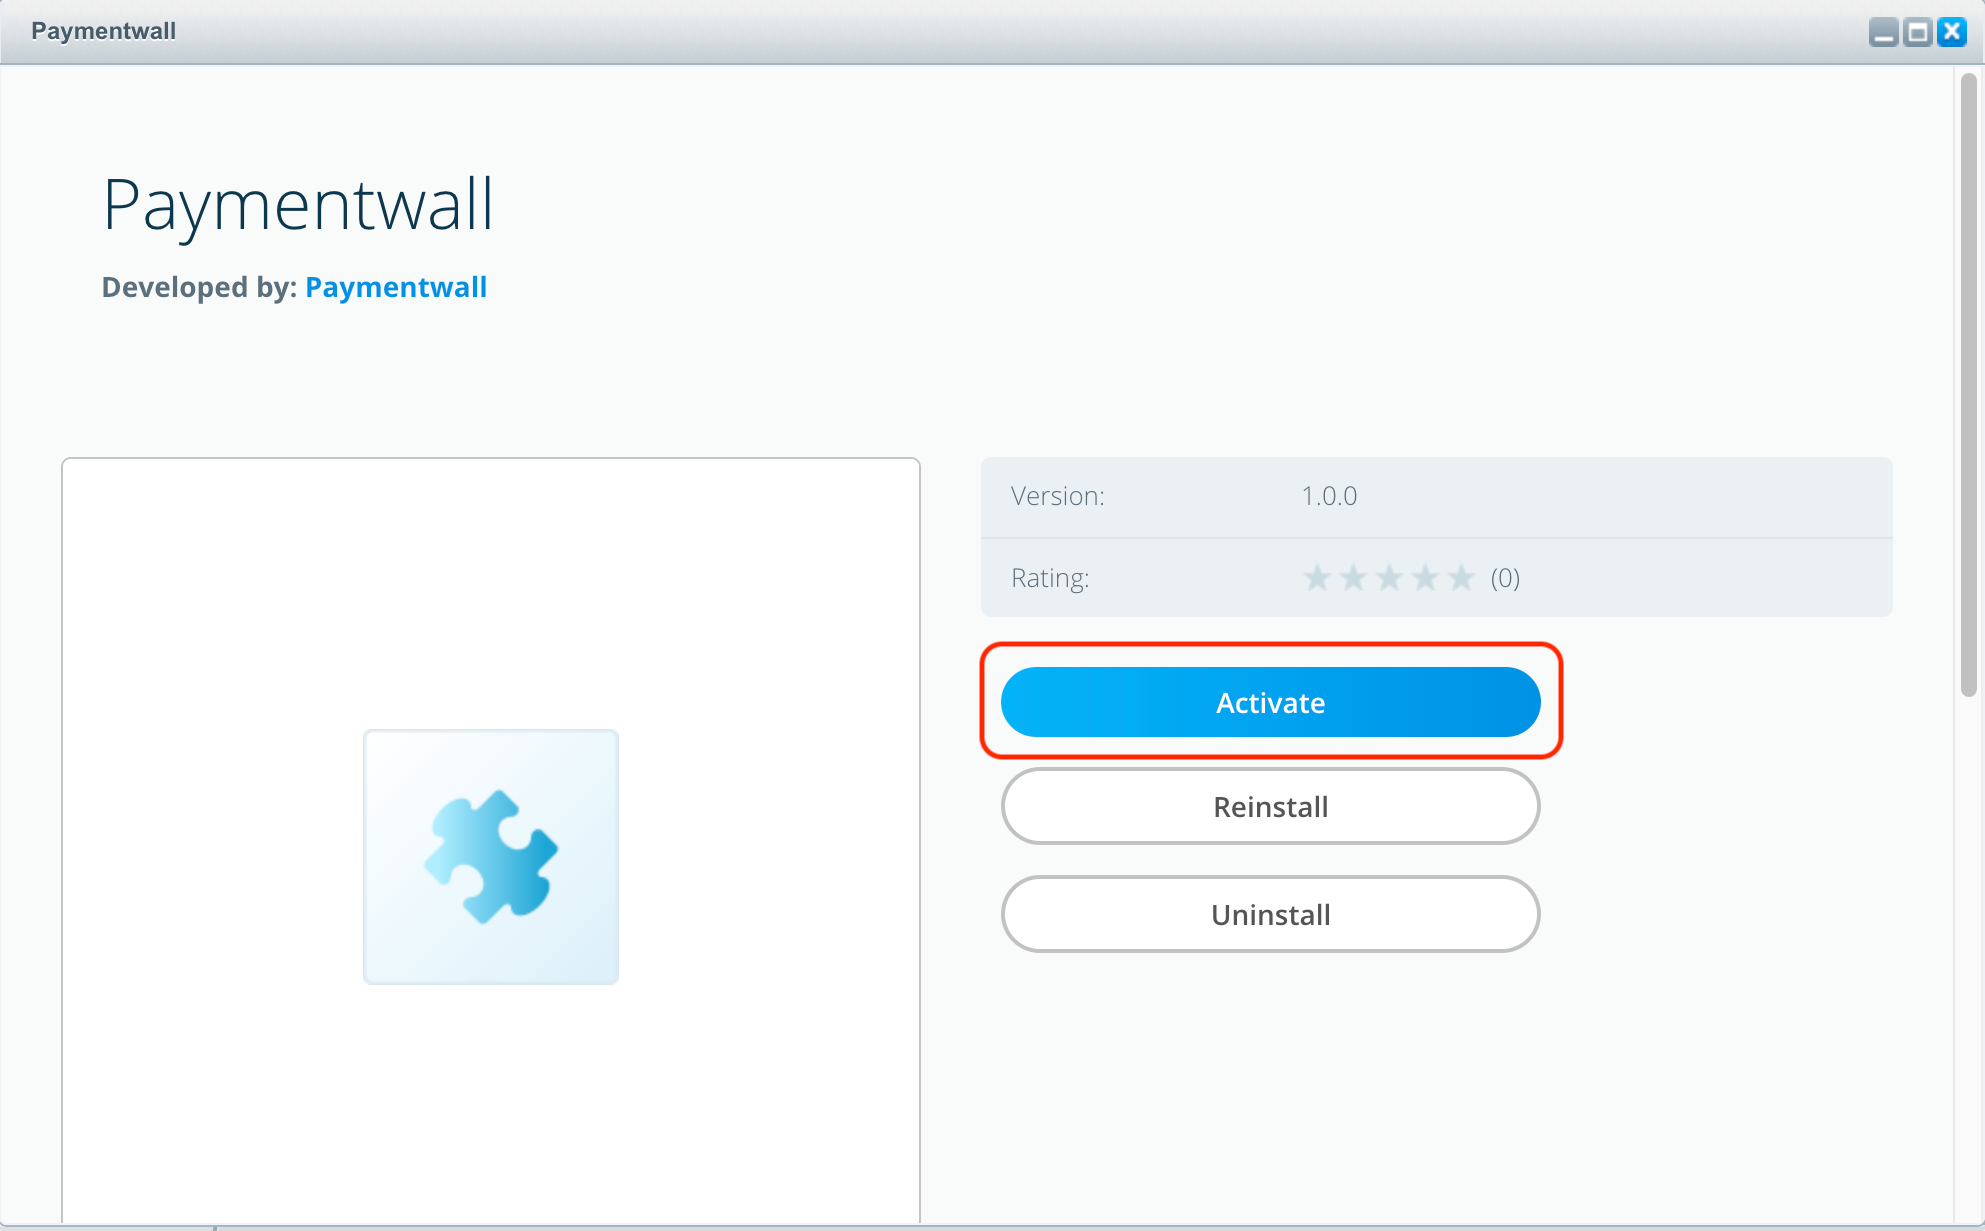
- Click Activate button
Step 4: Configure the project in Paymentwall
- Login to your Paymentwall merchant account
- Go to Project Settings → Settings
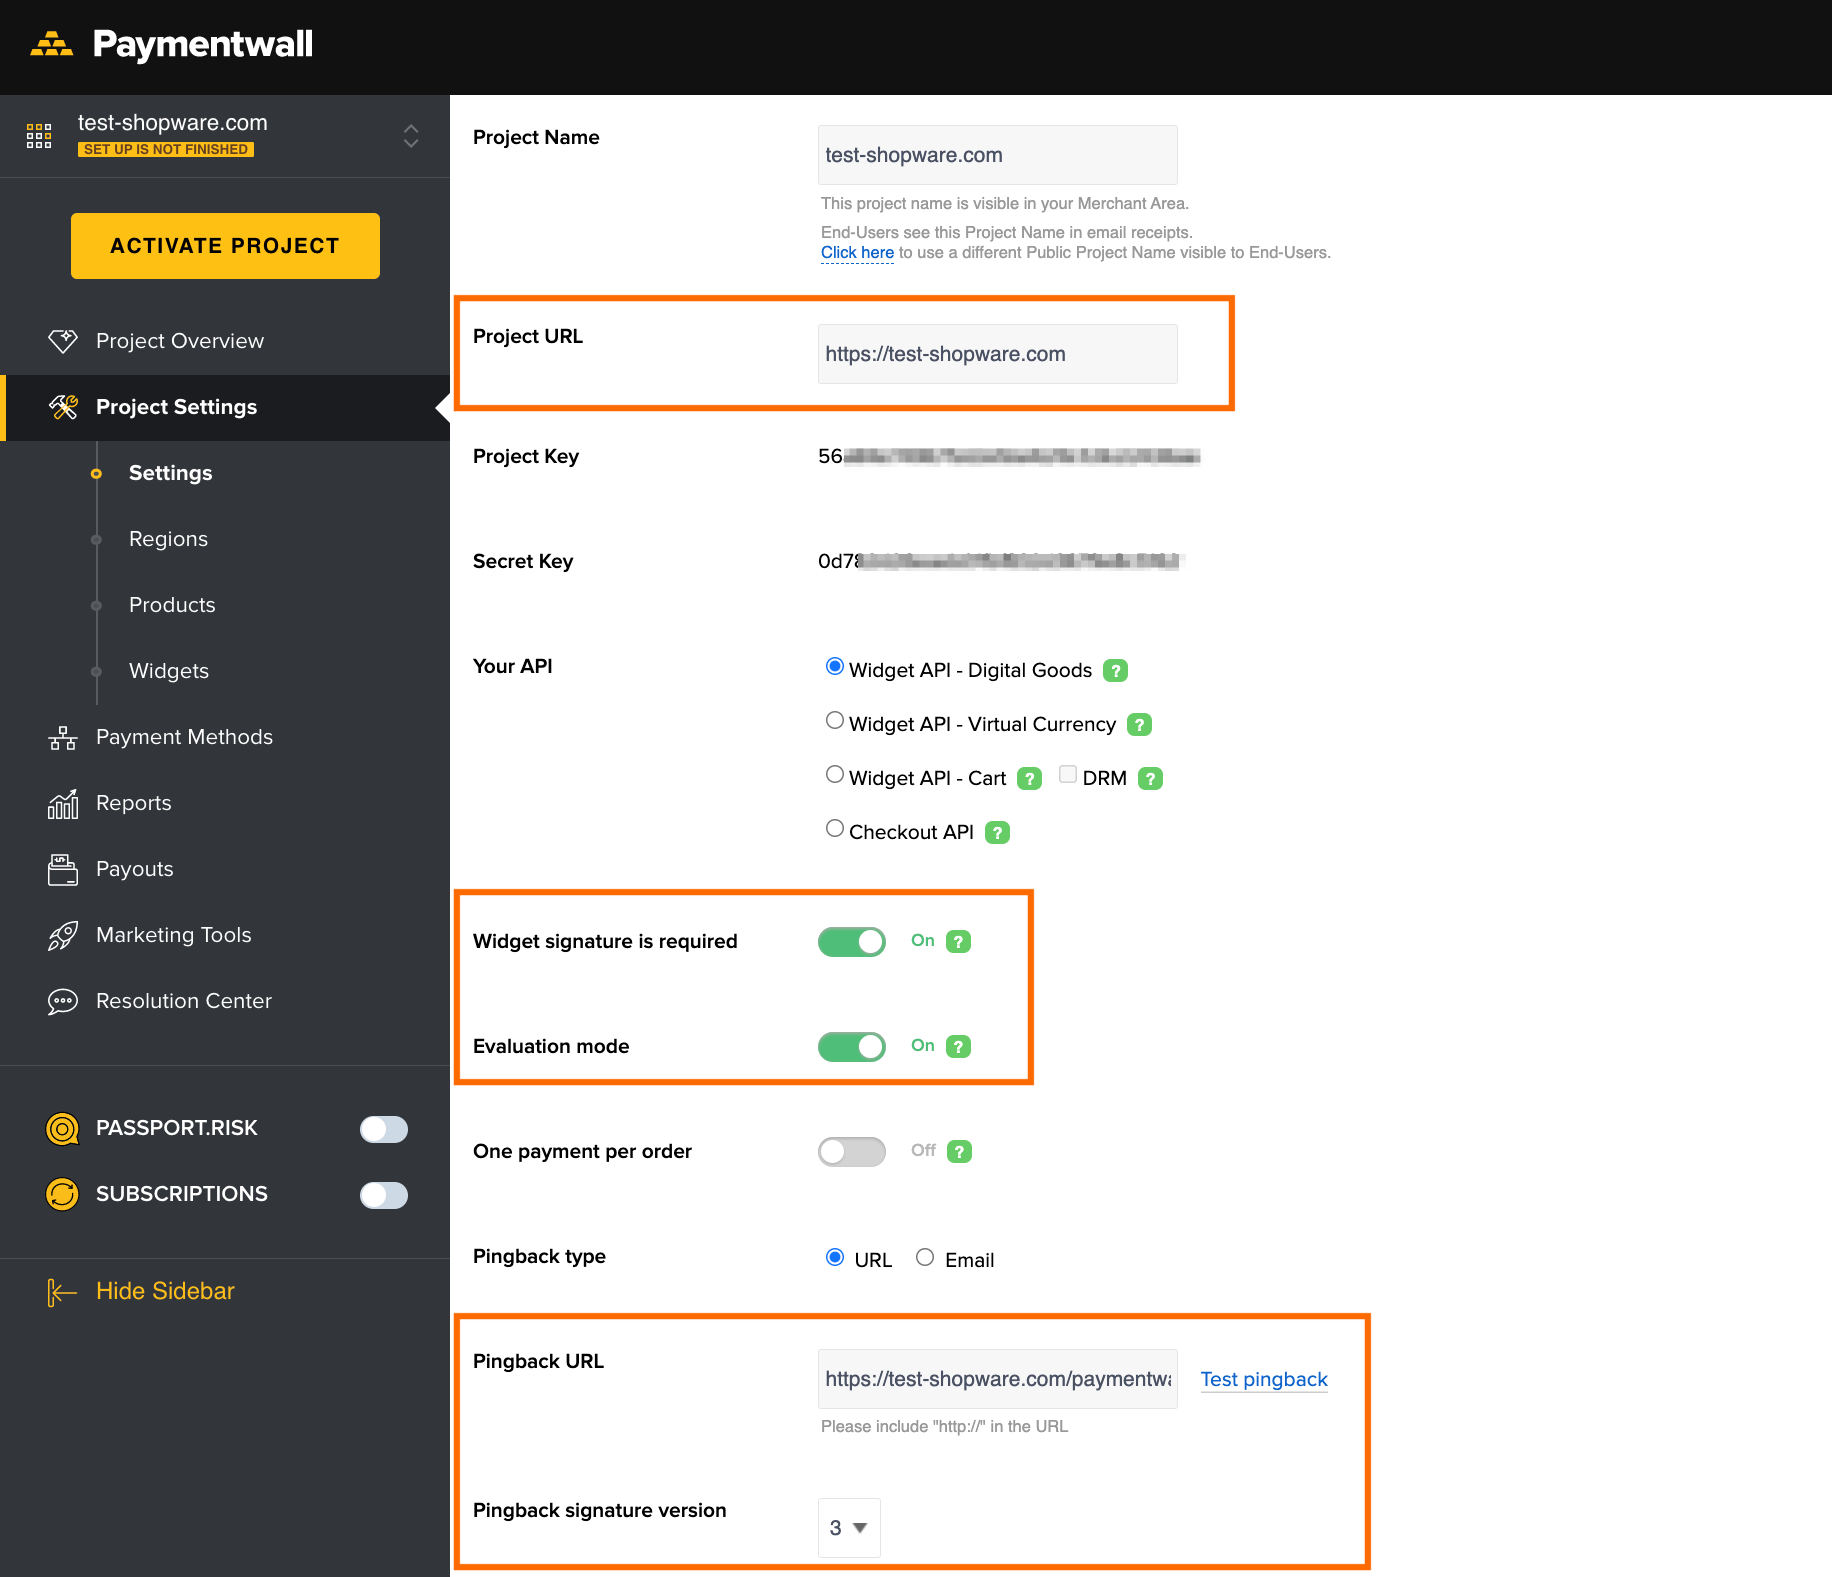
- Make sure that Project URL is a correct URL of your Shopware store
- Turn on the Widget signature is required toggle
- Turn on the Evaluation mode toggle
- Set Pingback type to “URL”
- Set Pingback URL to “http[s]://[your-domain]/paymentwallPingback”. Example: https://test-shopware.com/paymentwallPingback
- Set Pingback signature version to “3”
- Click Save changes.
Do not close this page, as you will need it for further configuration steps
Step 5: Configure the Paymentwall plugin in Shopware Admin
- Log in to Shopware Admin Panel
- Go to Configuration → Plugin Manager → Management → Installed
- Find Paymentwall in the plugins list and click the Edit icon.
-
Scroll down and open the Configuration tab
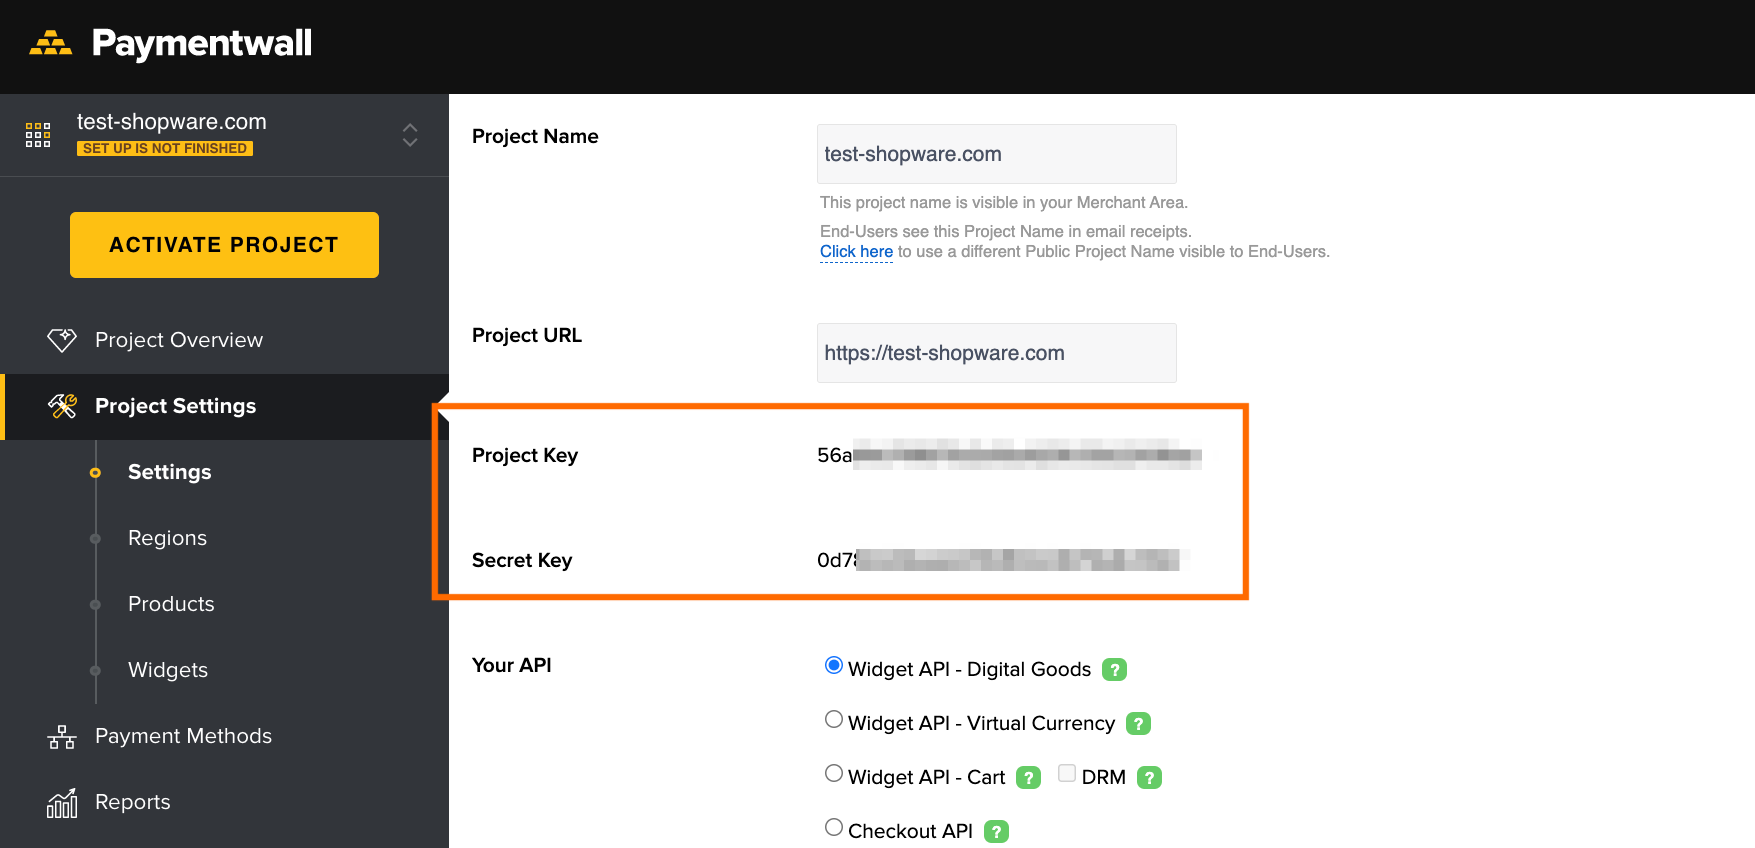
- Copy the following settings from your Paymentwall project and paste them to the Basic configuration section:
- Project Key
- Secret Key
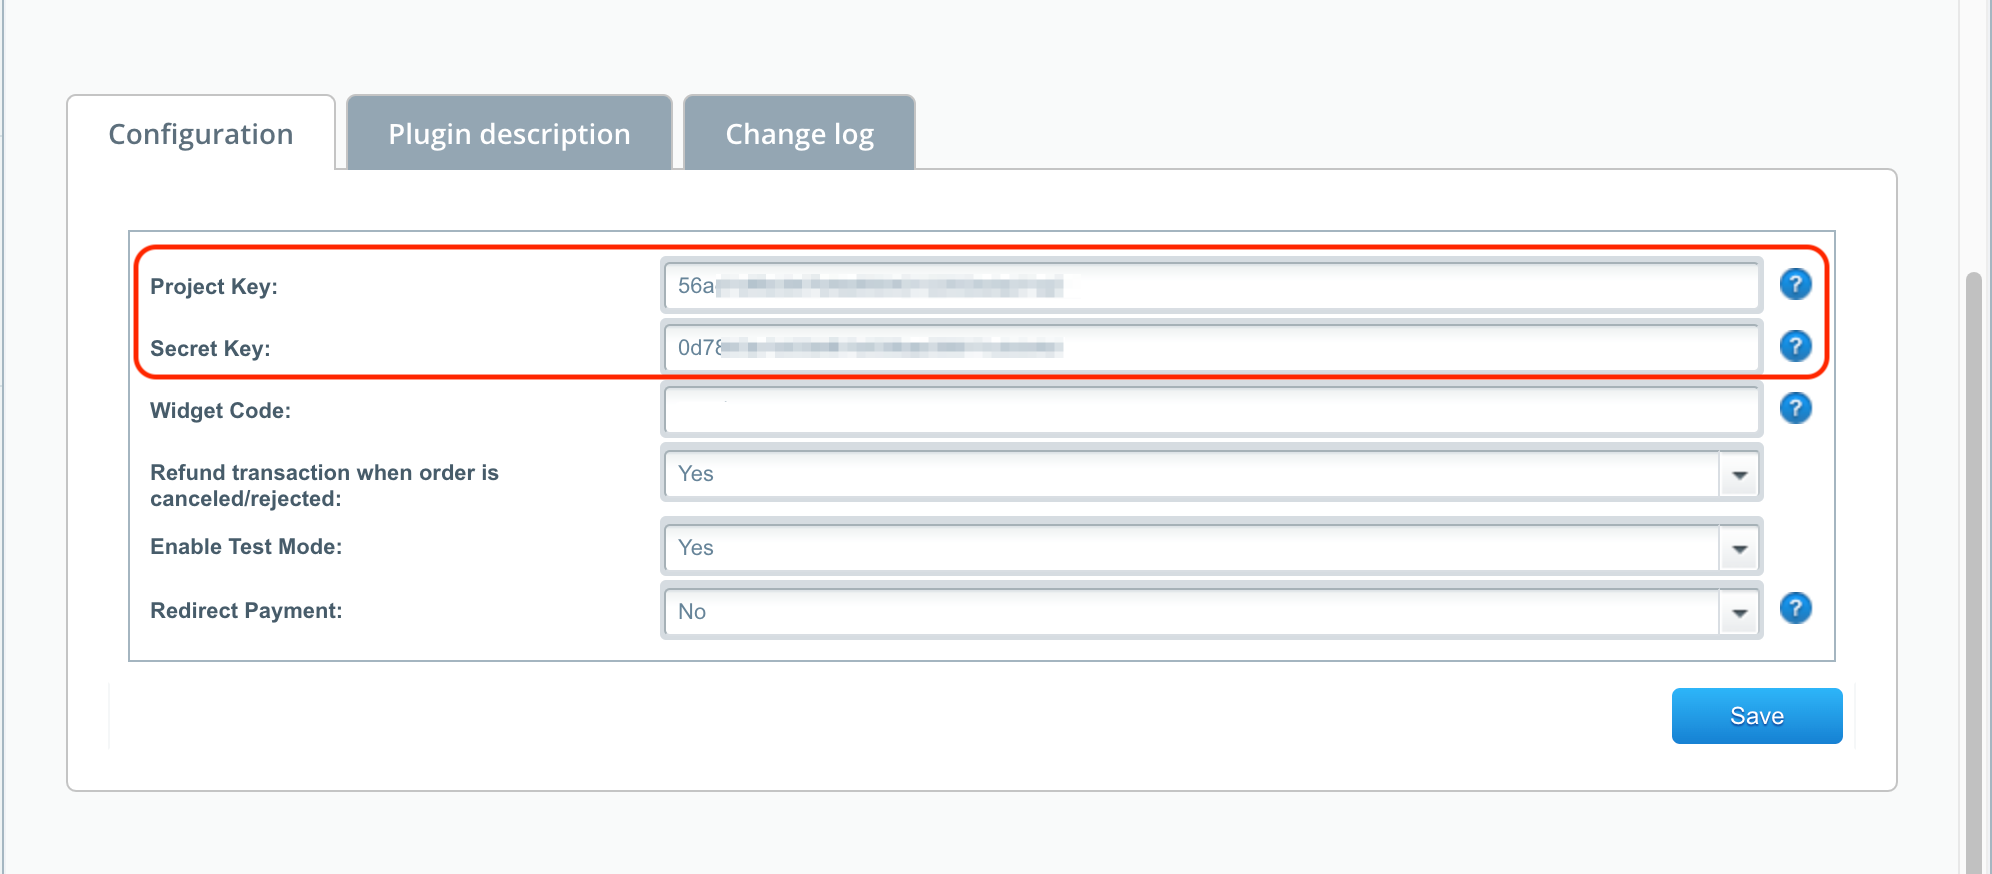
- Additional settings:
- Widget code - leave empty at this point
- Refund transaction when order is cancelled/rejected - set Yes if you want the transactions to be refunded automatically
- Enable Test Mode - set Yes to enable Test payment method
- Redirect Payment - set Yes to redirect customer to checkout on Paymentwall website
- Click Save button
Step 6: Activate Paymentwall payment method
- Log in to Shopware Admin Panel
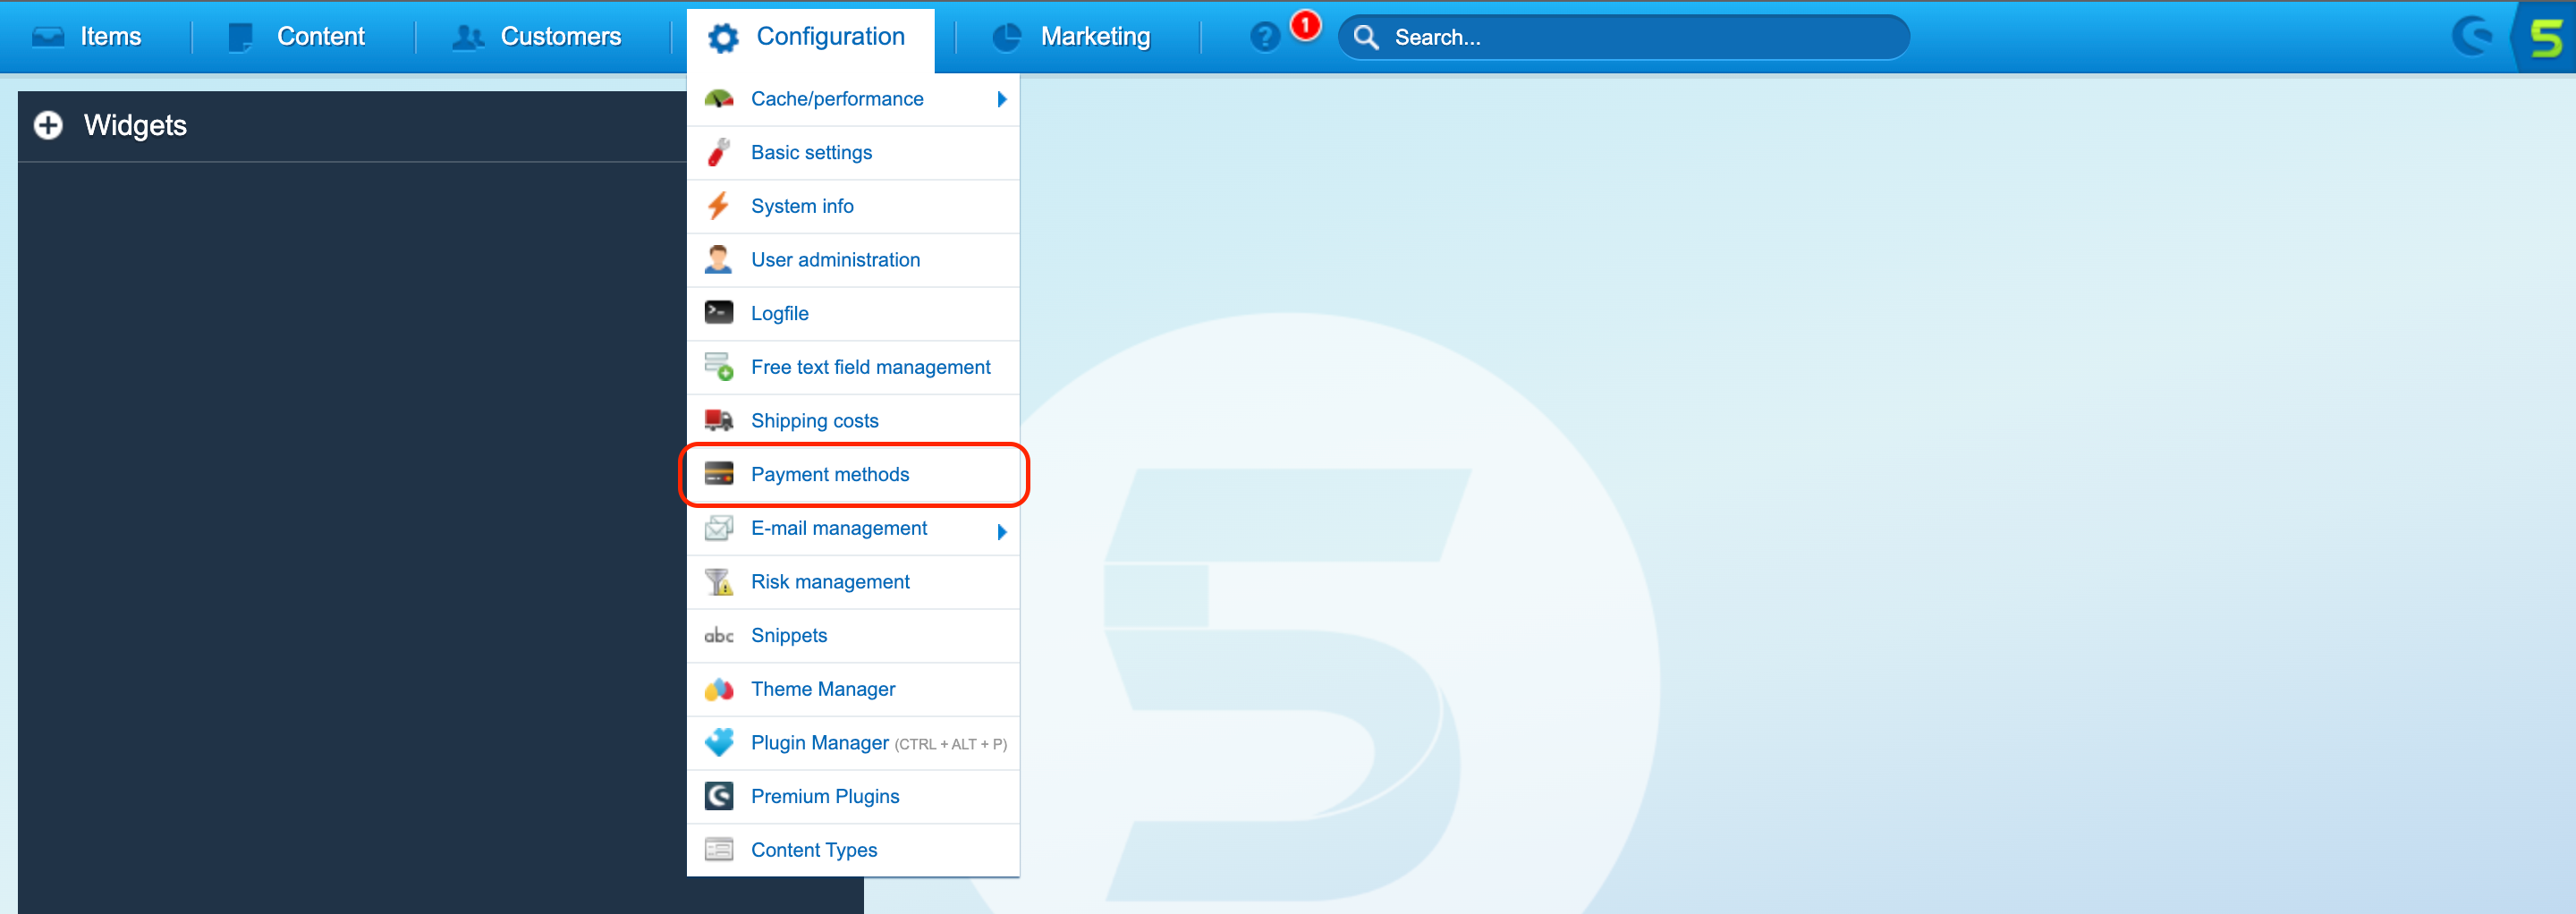
- Go to Configuration → Payment methods
- Select Paymentwall
- Check the Activate checkbox
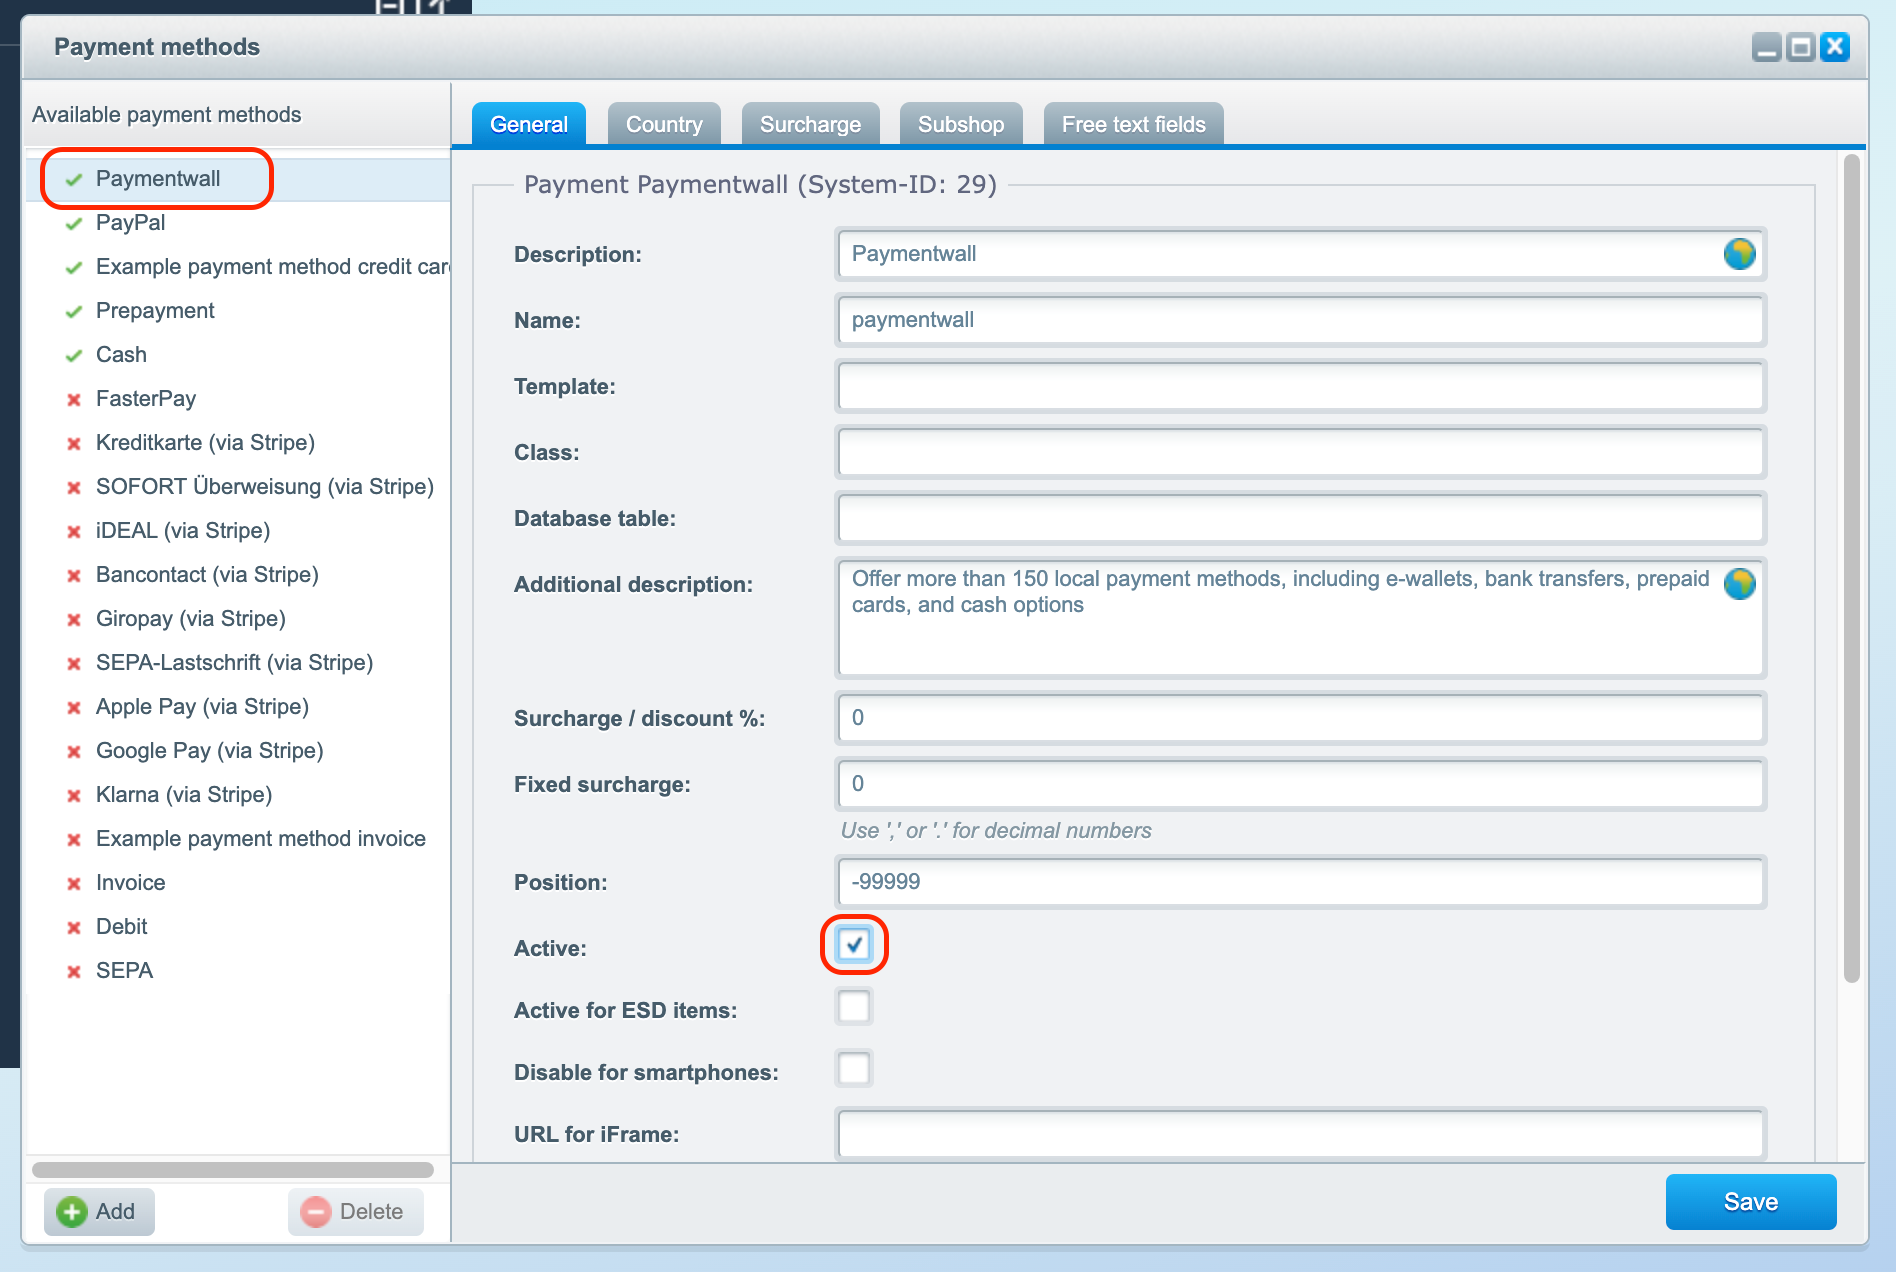
- Click Save button
Step 7: Let’s Go Live!
You can start to test payments of your projects.
Once you make sure everything works smoothly, please submit your project to go live.
Support
-
Paymentwall provides support for all up-to-date Shopware versions.
-
The list of available Payment Methods can be discovered here.
Contact devsupport@paymentwall.com if you find the version of your Shopware module is not supported.