Checkout API
Checkout API is the most popular way to integrate Paymentwall. It provides a payment page for a hosted checkout payment experience which can be connected to your application. The request for payment page consists of the parameters below:
- Product details.
- Payment methods that your customer wants to use.
- User interface ( style of payment page ).
Payment flow
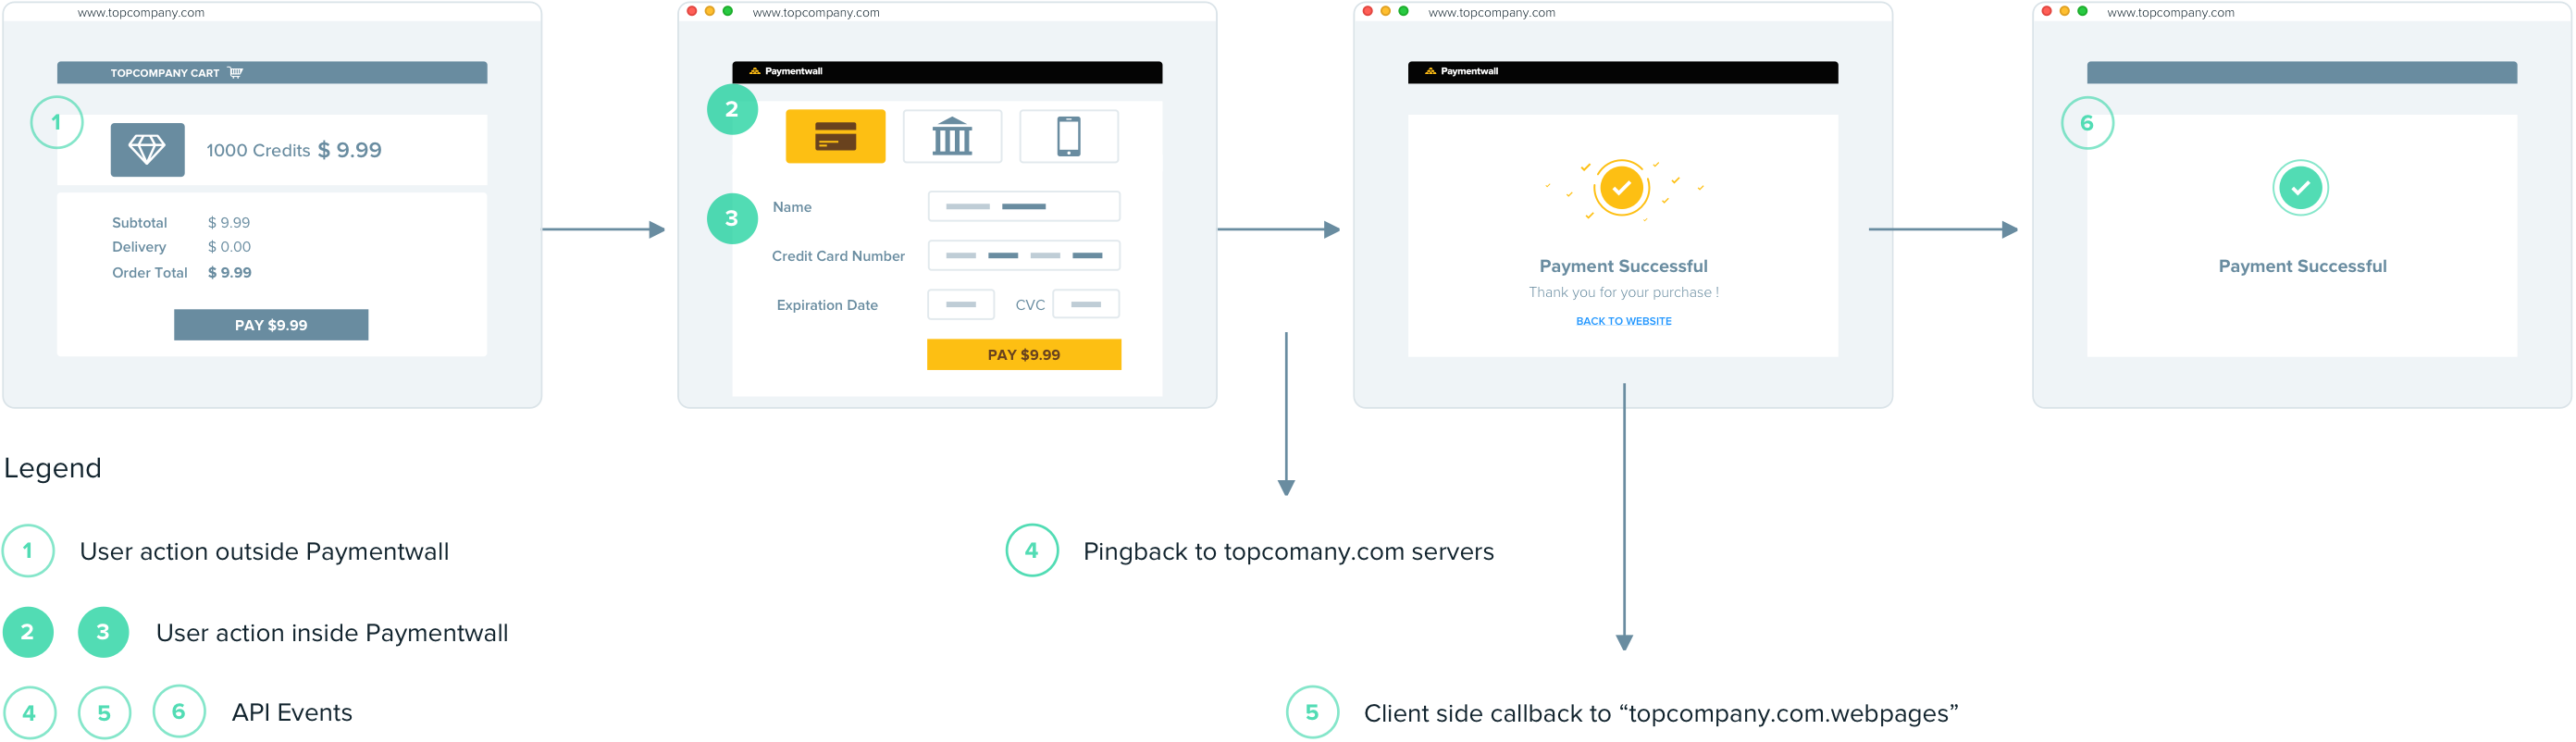
A typical payment flow of integrating checkout API can be described in 6 steps:
Step 1: Select the product inside of your application.
Checkout API expects one product/order to be passed in the request for payment page. You can combine the products into one order and send the order information through the request for payment page if more than one products need checking out,
Step 2: Select the payment method to pay with
For users selecting payment methods on Paymentwall websites, you can assign ps=all for all payment methods in the request for payment page.
Payment methods, which are displayed in the payment page, depend on the user’s IP address and configuration in Payment Systems of your project.
Select payment methods inside of your application (Optional)
Alternatively, you can establish a native payment methods selection form inside of your application. The payment flow is slightly different in this case.
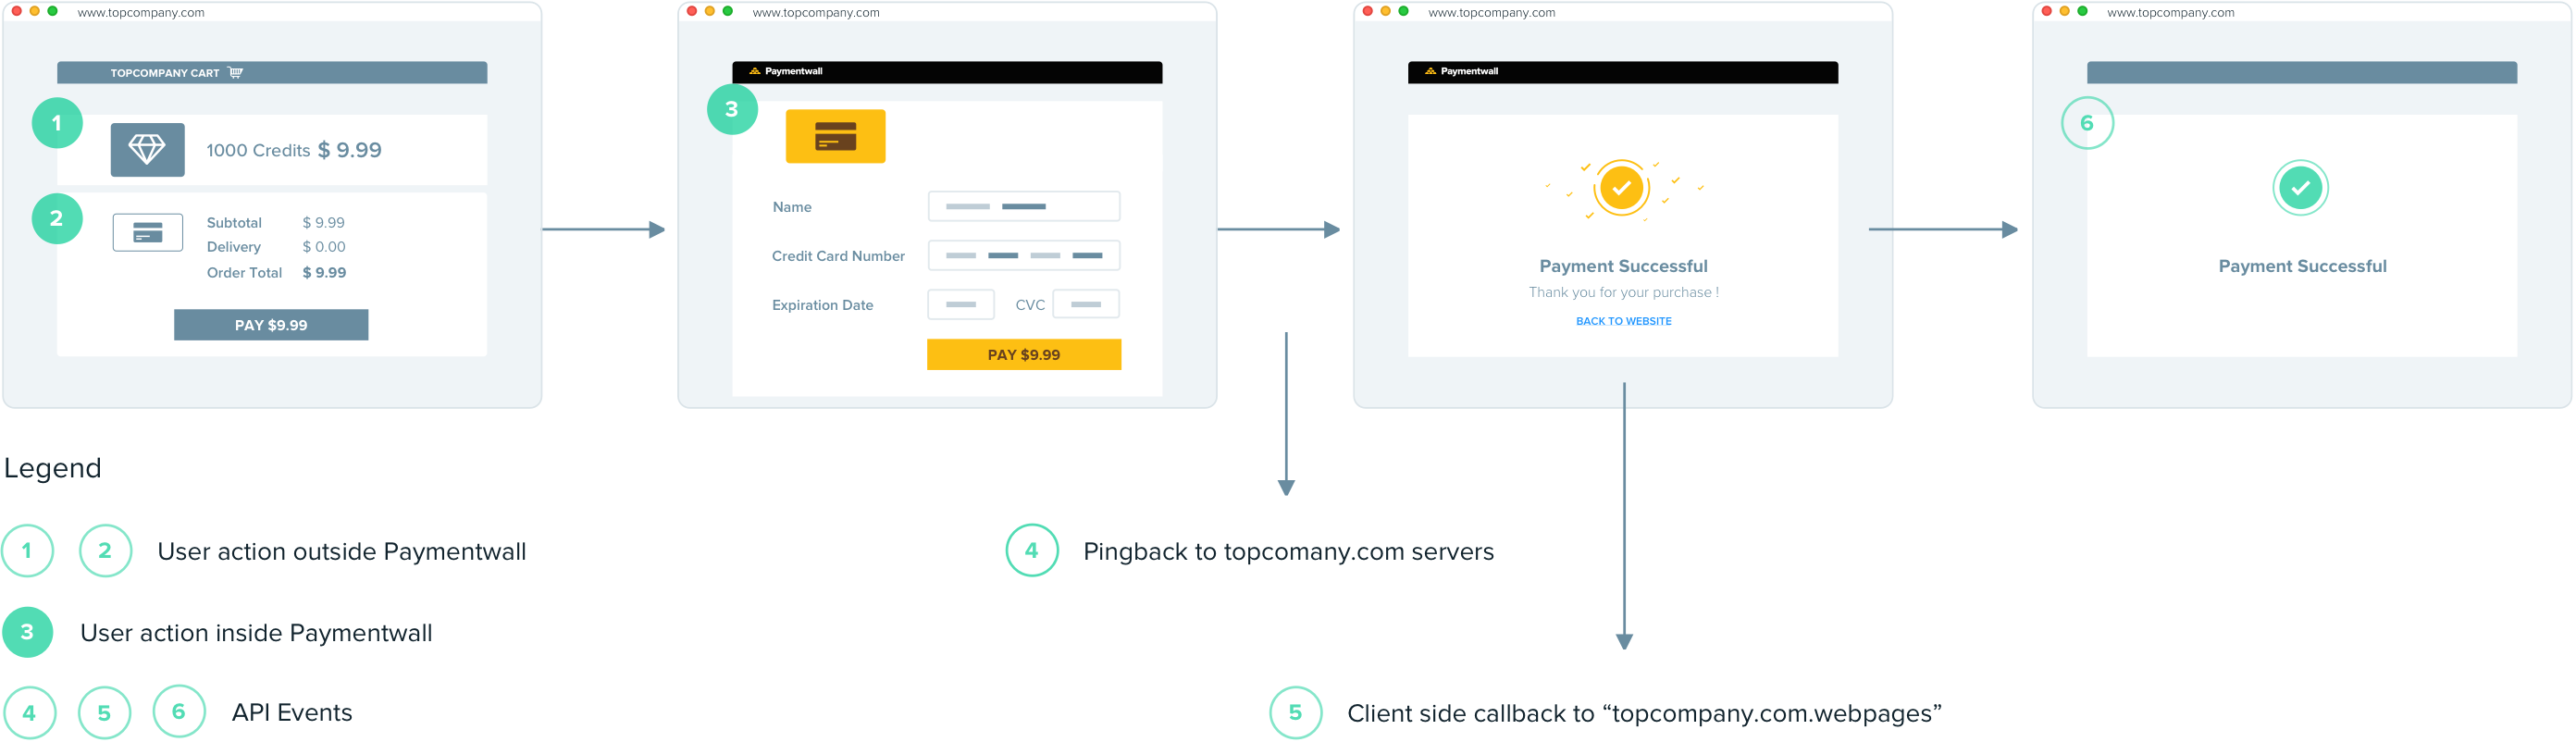
Your user will be able to see the corresponding checkout pages directly whenever they are redirected to Paymentwall websites.
The payment methods selection form is easy to establish, you can obtain the information of payment methods from payment system shortcodes and build the request of payment page with parameter ps, or use our payment systems API with following steps:
- Set country code. Obtain the country code of your customer based on his ip address. You can also set a fixed country code if your customer are from the same country.
- Get the list of payment methods. Dynamically pull the list of methods via payment systems API, which are active in given country. A list of all methods we support for the specific country will be returned by payment system API, you can use it to build your payment methods selection form. Below is a sample response for one payment method:
[{
  "id":"idealnl",
  "name":"iDeal",
  "new_window":false,
  "img_url":"https:\/\/api.paymentwall.com\/images\/ps_logos\/pm_ideal.png",
  "img_class":"ideal"
}]
-
Combine
img_url,namewith radio button or your preferred way to create available payment methods list. -
Build the request of payment page with
ps=id(Obtained in previous step) to redirect him to Paymentwall checkout page.
Step 3: Display the payment page
Once the payment page is generated successfully, you can direct your customer to Paymentwall to complete the checkout in one of the following ways:
-
Embed payment page as an iframe into your applications. The iframe must include the attribute allow=”payment; popups” to ensure payment methods such as Google Pay buttons display and function properly.
-
Make Redirection to show it as a standalone page.
Your customer will be able to fill out the payment details and do the checkout on payment page.
Step 4: Pingback
Paymentwall’s asynchronous payment notification, which is called Pingback, is sent out immediately once the user makes a payment. It contains a transaction id (which is called reference id/ref ) from Paymentwall and final payment status for each payments.
-
The generation of a Pingback represents changes in the state of its corresponding payment, which is identified by its attribute
type. Eg,type=0means successful payment. As long as you have received withtype=0, you can deliver products to your customer according to the rest of information which is included in Pingback. Refer to Pingback for details. -
Your server must be able to handle our Pingback and proceed the delivery to your customer accordingly. At the same time, the transaction id from Paymentwall,
ref, is expected to be stored into your database in case of any refund or chargeback action.
Step 5: Client-side callback
Whenever users make a payment, Paymentwall sends a client-side callback, which uses window.postMessage() mechanism to deliver events. Refer to client-side callback on how to handle it.
Step 6: Redirect user to payment success page
If you passed success_url as an optional parameter in the request for the payment page, an option will show up to redirect your users back to your application.
Configuration
Configure your project in merchant dashboard:
-
Select Your API as Checkout API in Settings.
-
Fill the Pingback url to receive asynchronous notification in Settings.
-
Adjust the coverage of each payment methods for your project in Payment System.
-
Create your preferred interface in Widgets. Refer to widgets about the attributes of each widget.
There is no need to do configuration for Region, Offers and Products sections.